Follow along and discover your next inspiration as we cast on for projects we love, explore new techniques, and dish about the latest and greatest from We Crochet.
Meet the team »
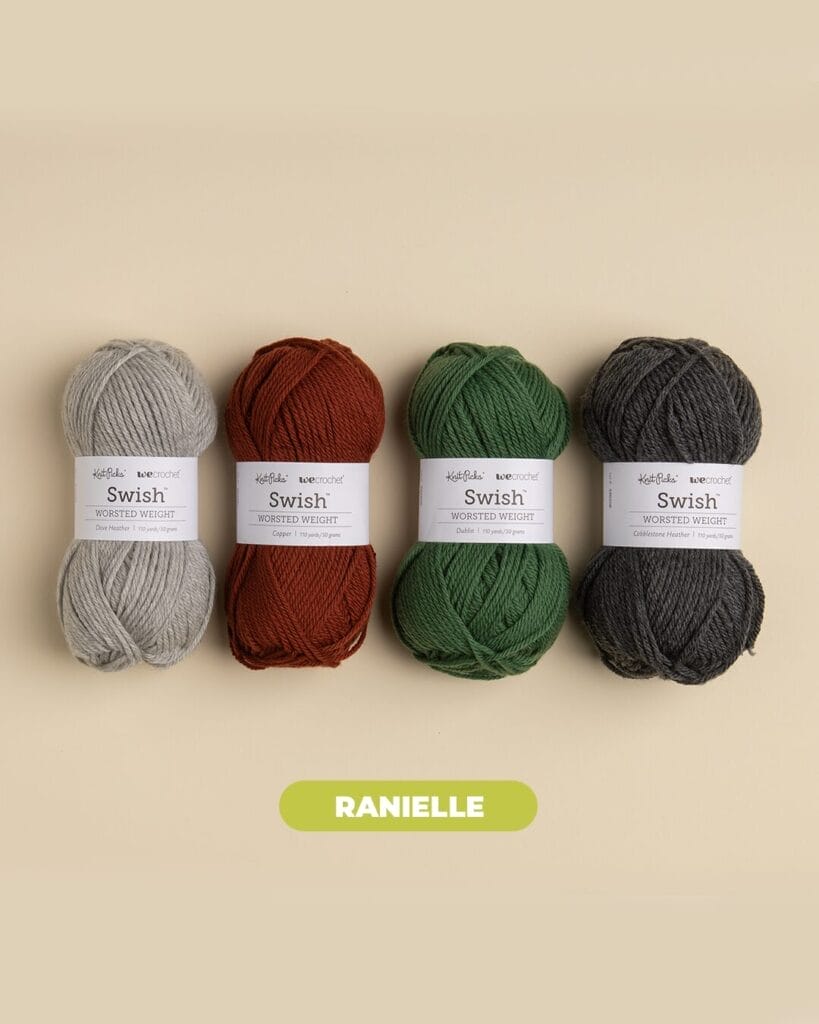
After deciding which sweater to stitch, the team still had the difficult choice of picking their yarn and colors. Luckily, this team has strong preferences making the decision a quick and easy one.
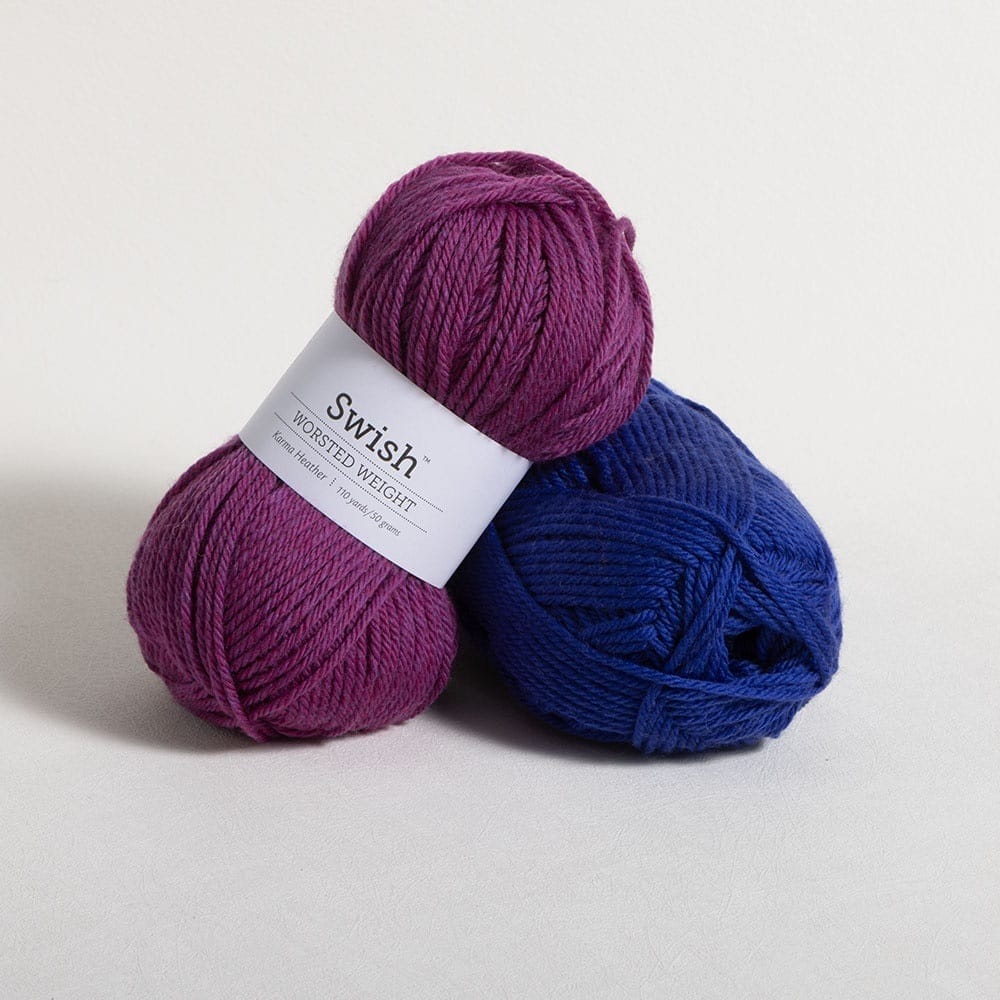
The original samples were made in Swish Worsted, a super soft and squishy 100% Fine Superwash Merino Wool. We are all huge fans of this yarn so yarn selection was an easy decision.
The decision for which colors and how many to use was a bit more challenging and we are all adding our own spin on our color choices. Because the stitch pattern for both sweaters is a simple extended crochet stitch it makes changing up the width and number of stripes, or color blocking, an easy modification.
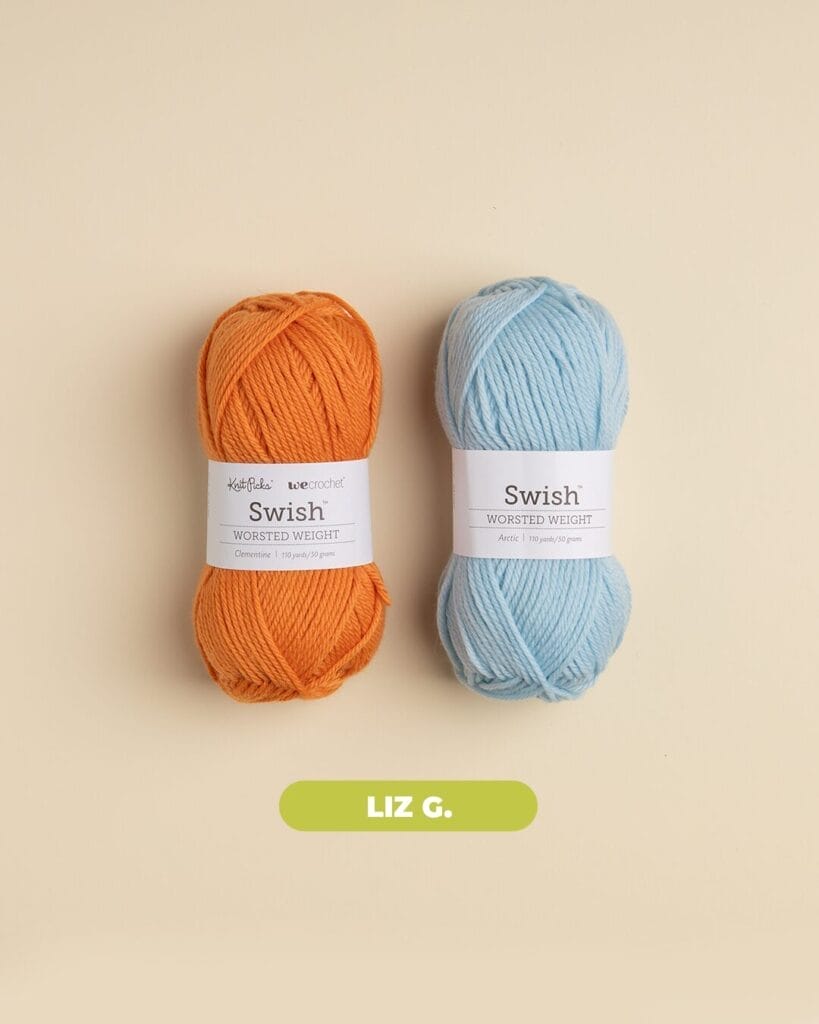
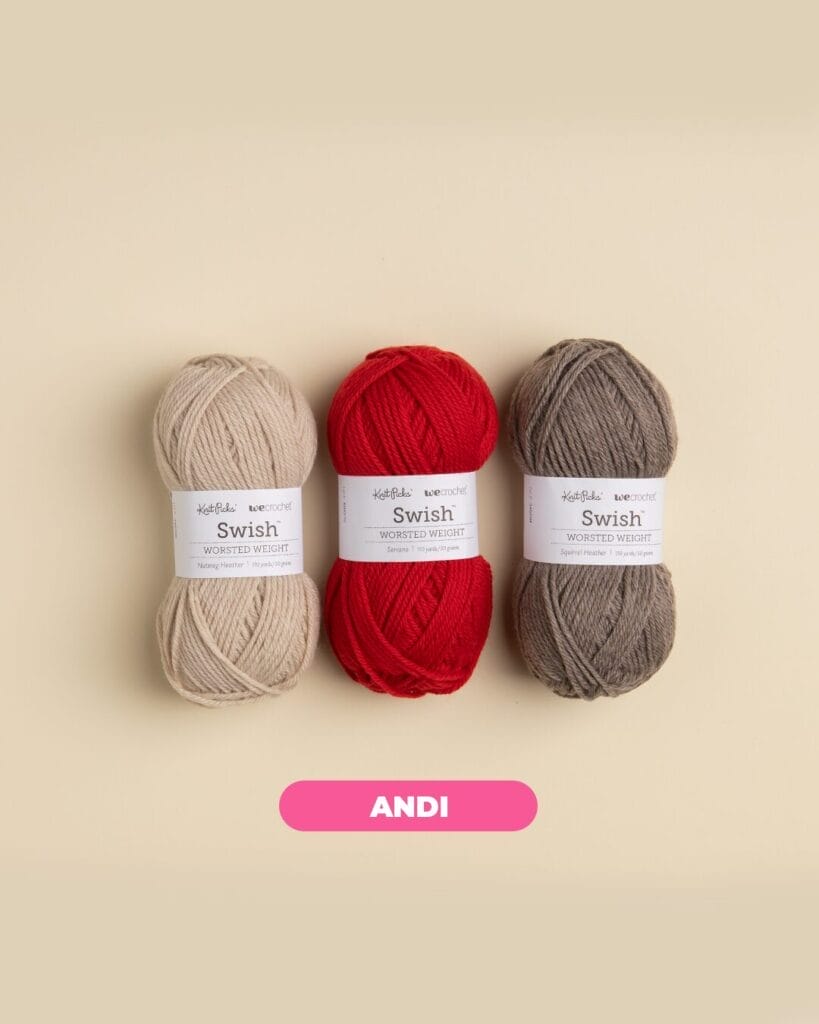
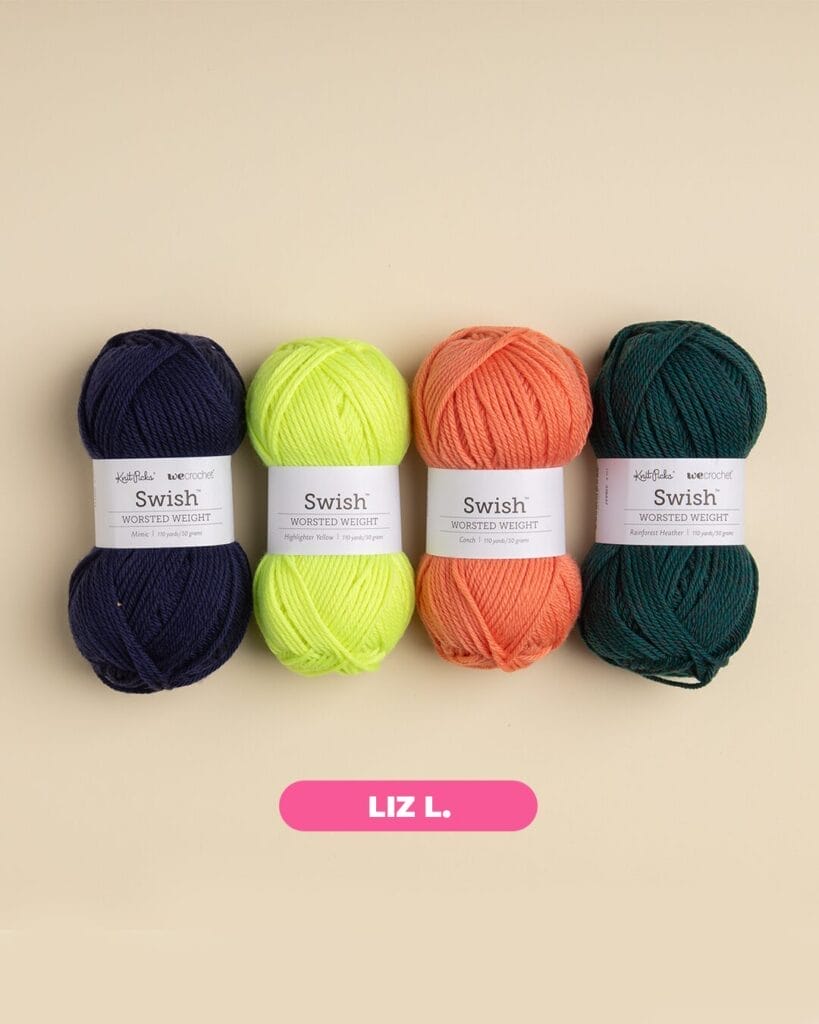
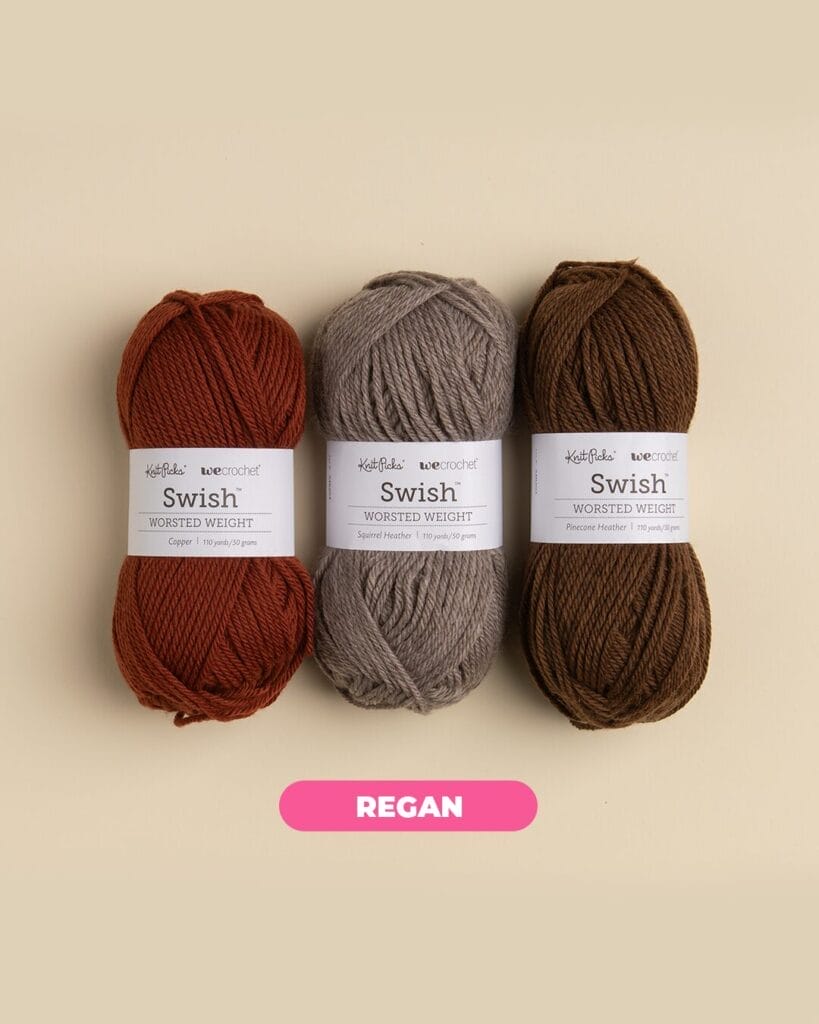
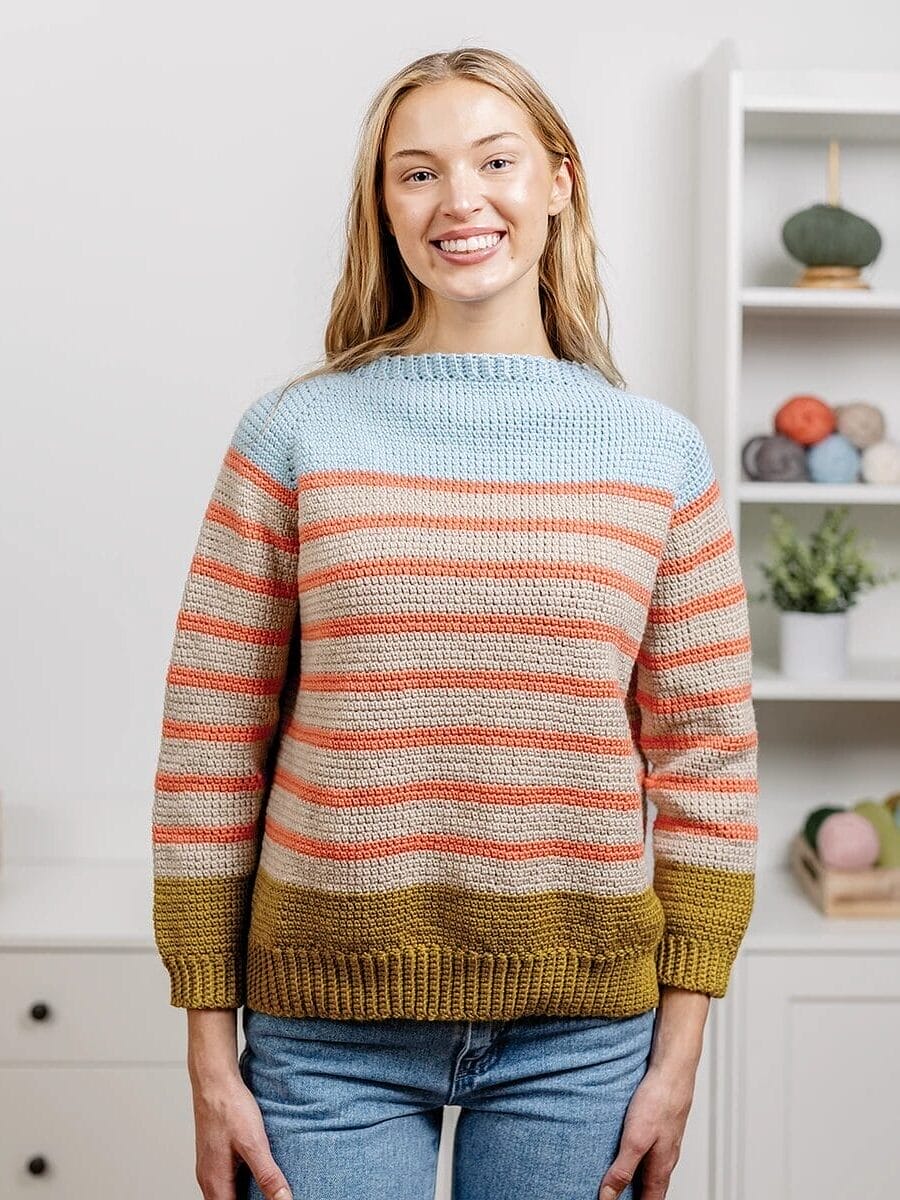
Stitching Rosie, the raglan sweater are Ranielle, Liz G, Andi, Liz L, and Regan
ChelseaCopperMimic, Bluebird, Dove Heather
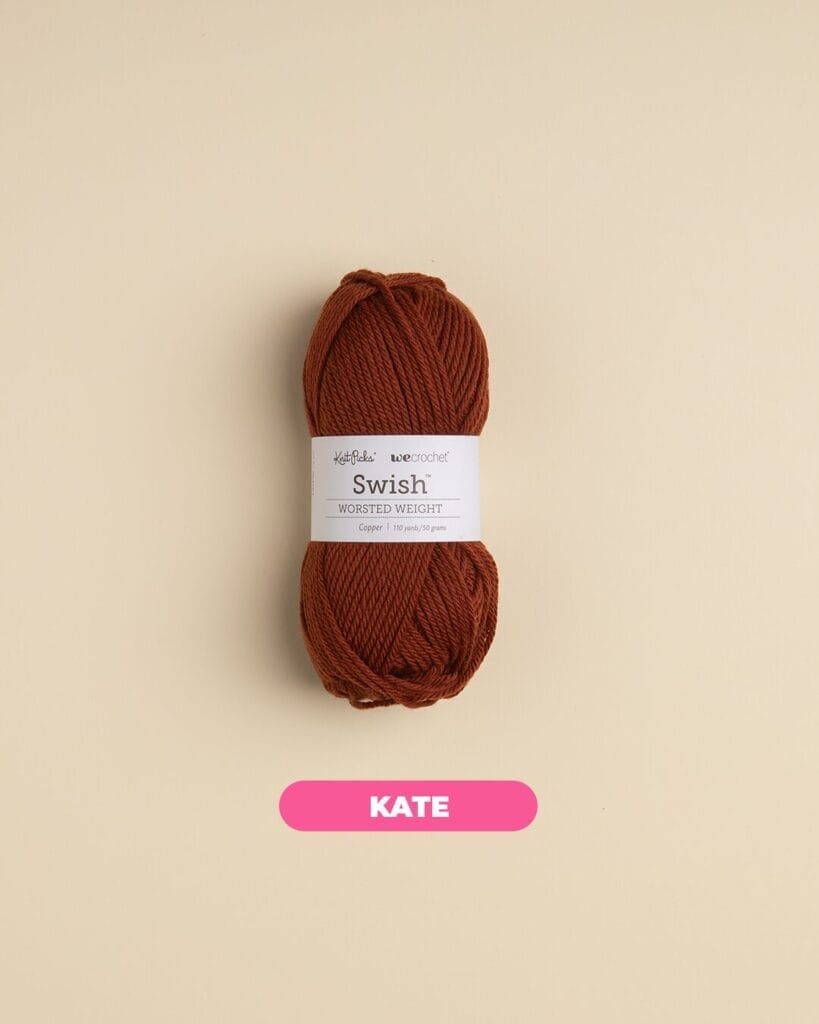
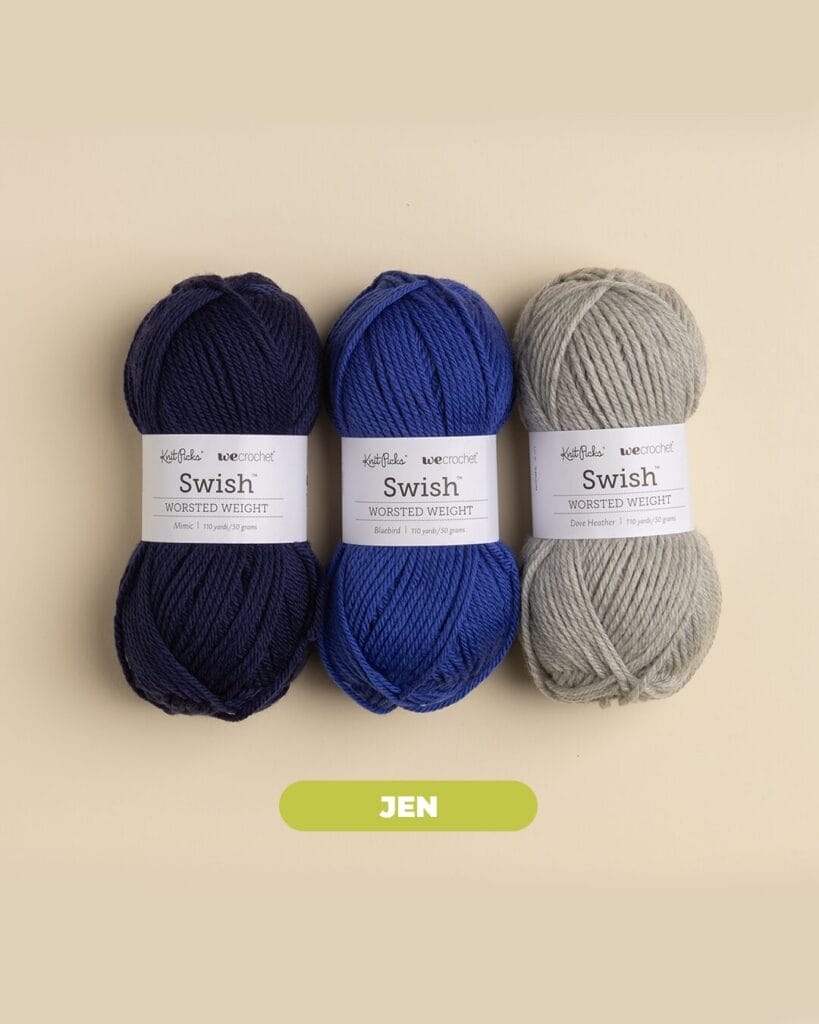
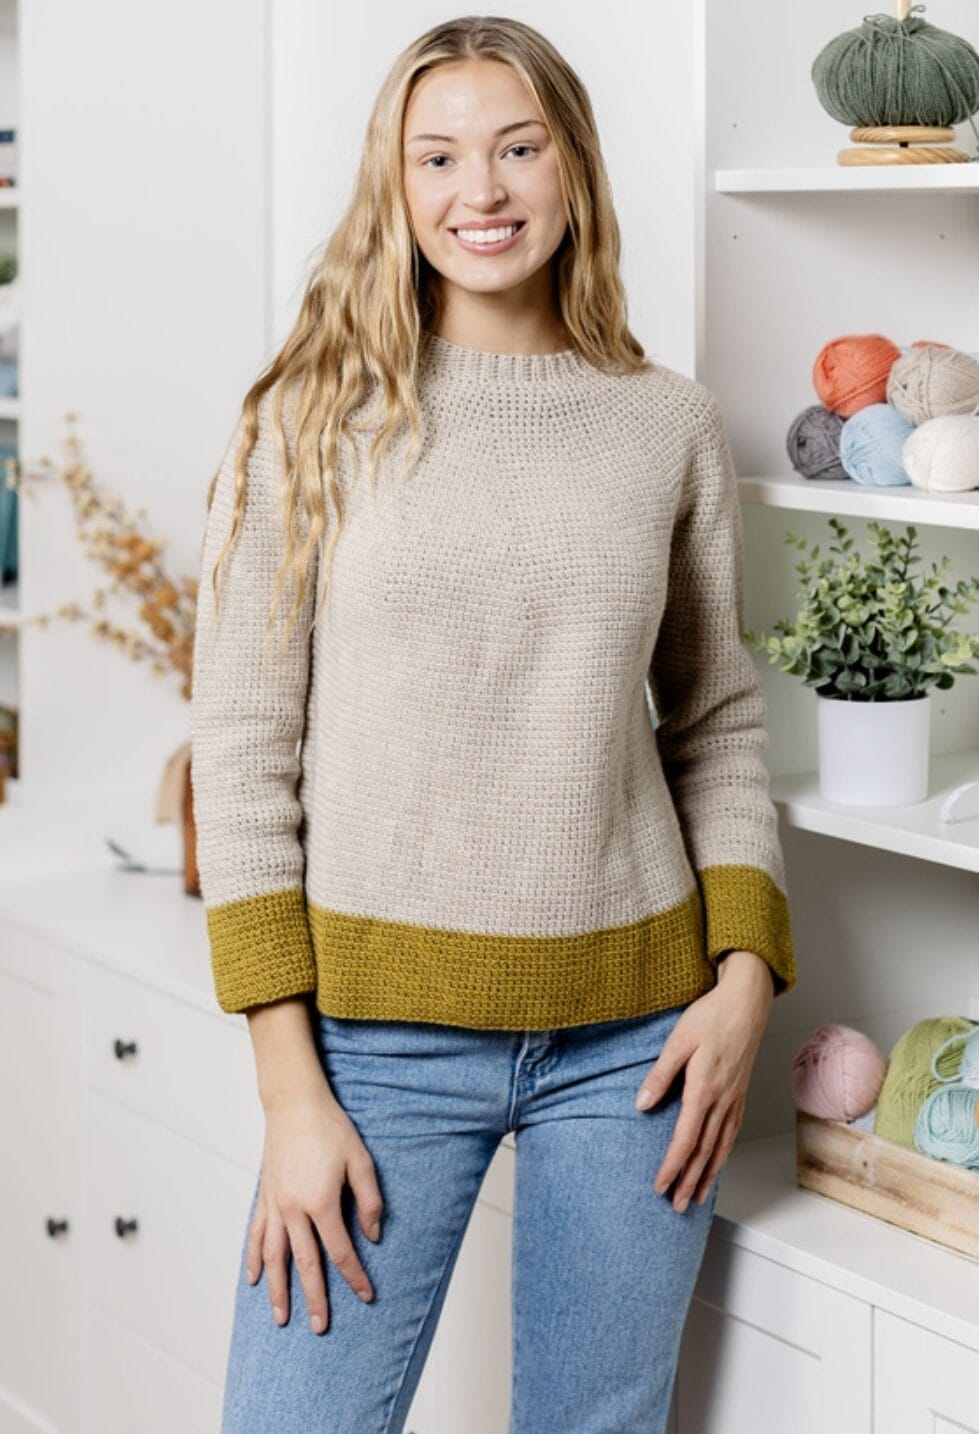
Stitching Chelsea, the circular yoke sweater, are Kate and Jen
Which sweater, yarn, and color combo did you choose? Be sure to tag your own work under the hashtags #teamrosie / #teamchelsea / #wecrochetcal. We can’t wait to see your sweaters.
Get your favorite hooks and your Swish Worsted, and crochet along with us!
Here’s the Hook:
What: Crochet the Rosie or Chelsea Sweater along with us
When: February 7th – March 19th
Skills to know: Extended Single Crochet, Single Crochet decrease
Who: Everyone who wears sweaters, especially first time sweater makers
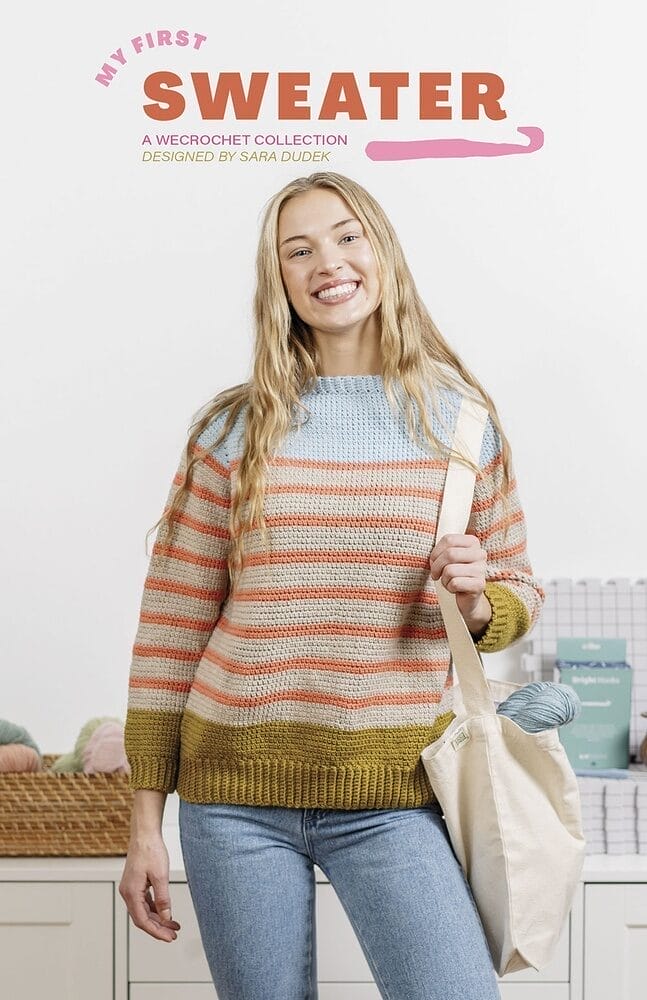
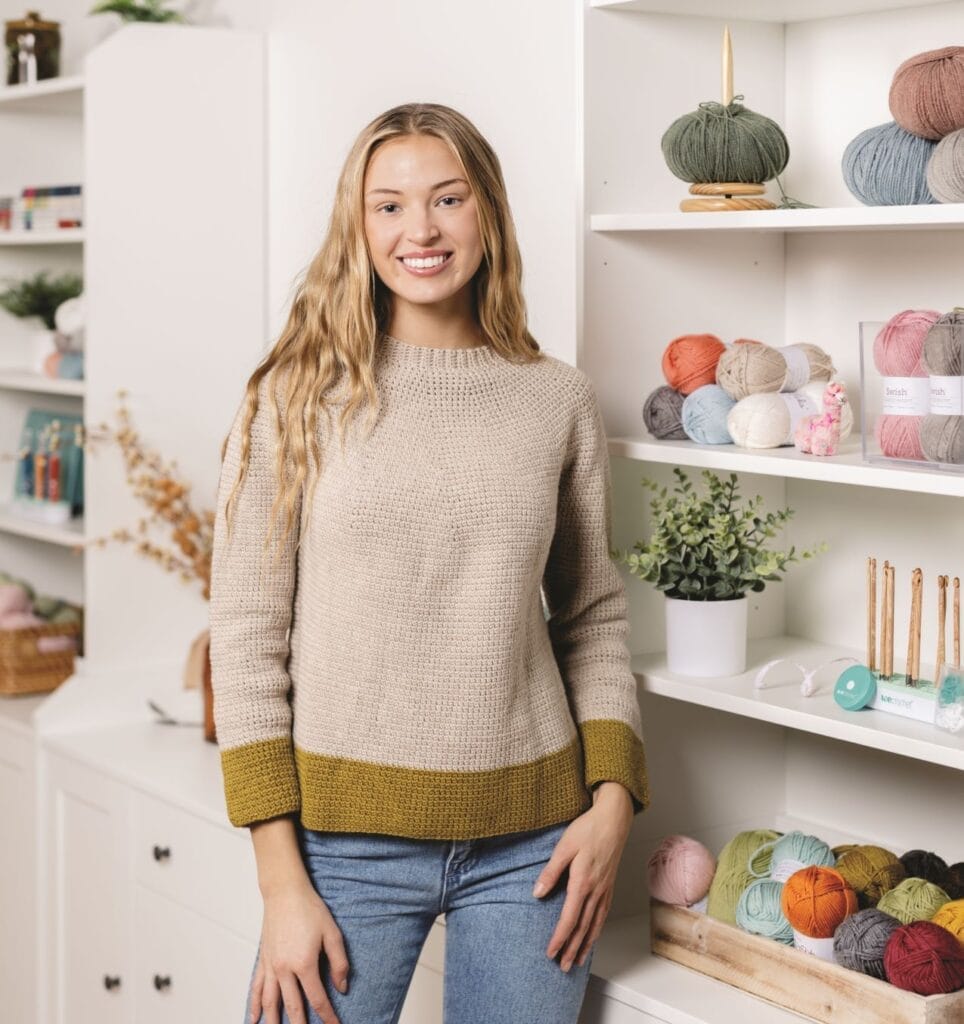
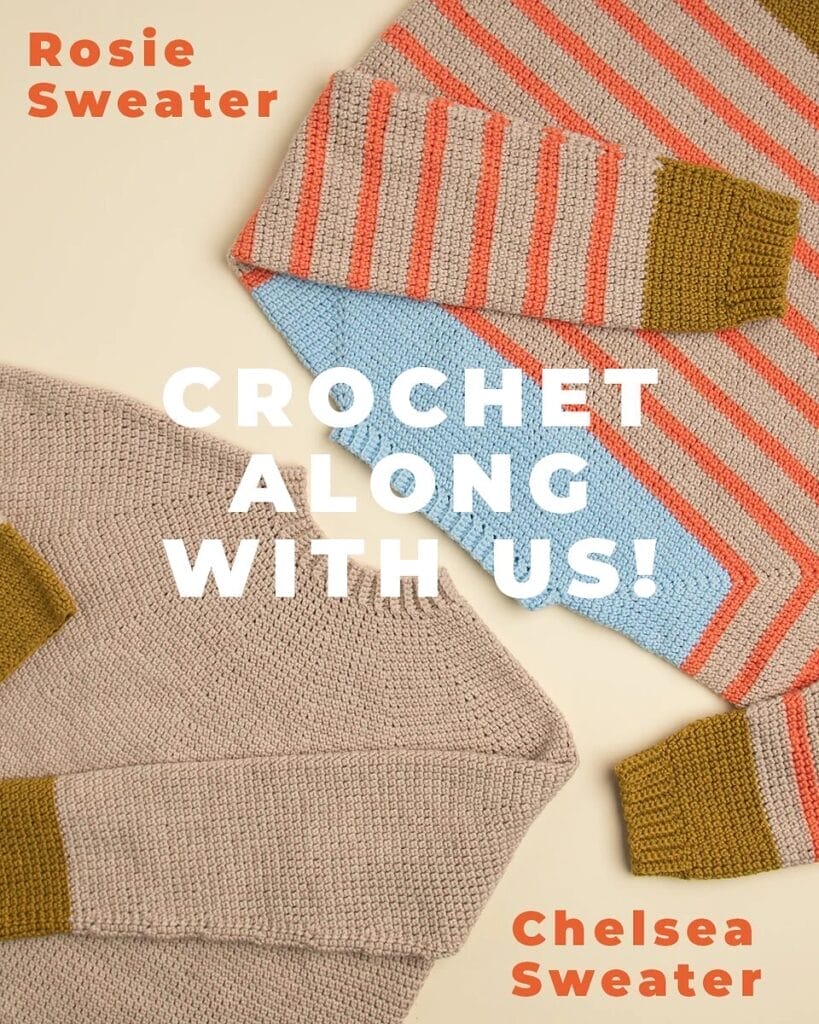
Our team loved our newest collection My First Sweater, and it inspired us to stitch sweaters for ourselves. The collection features 5 designs covering most sweater shapes and is the perfect introduction to sweater making. From seamless to seamed, each pattern in this collection combines simple stitches with easy shaping to create sweaters you will reach for again and again.
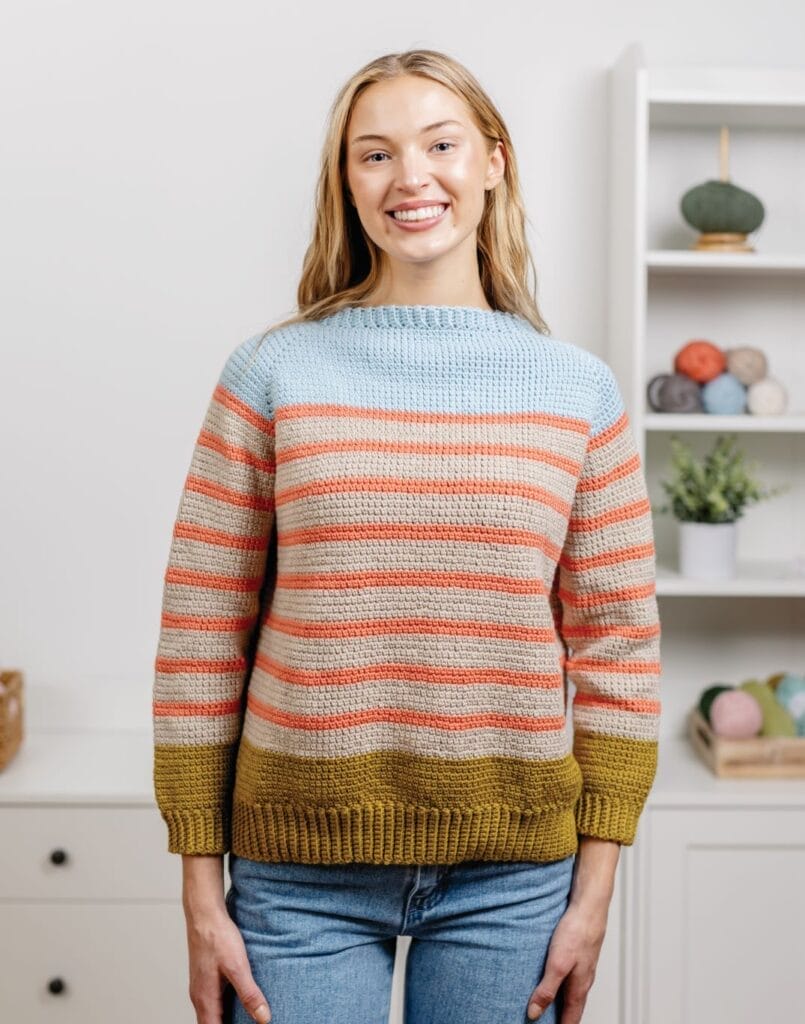
We decided to limit our options to the Rosie & the Chelsea–both sweaters featured similar top-down construction with minimal seaming. The main difference is Rosie is a raglan and features colorful stripes, while Chelsea is a circular yoke with simple color blocking. We are all using Swish, a super-soft fine superwash Merino Wool.
RosieChelsea
Be sure to check back next week to see everyone’s color and sweater choices.
We’ll be sharing our own progress both here and on social media under #teamrosie / #teamchelsea / #wecrochetcal. Share your own work under the hashtags, too!
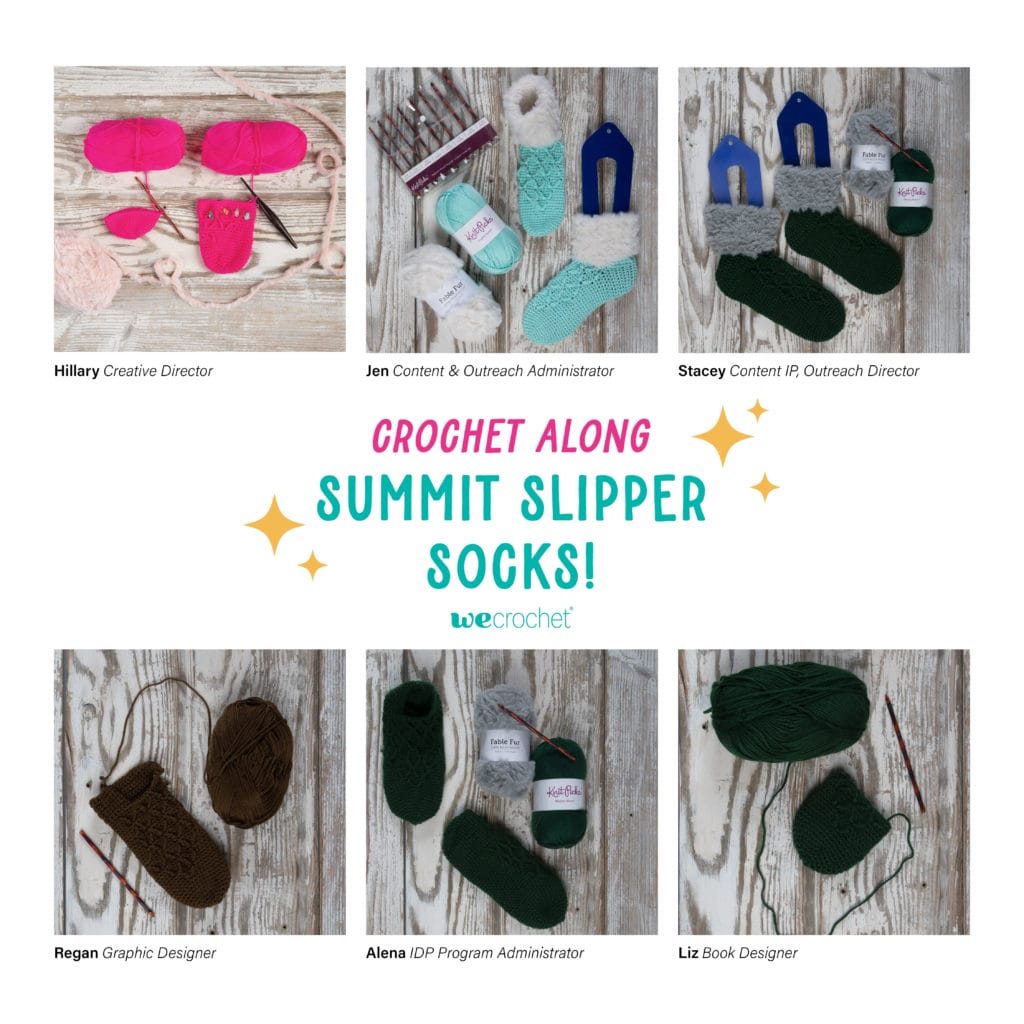
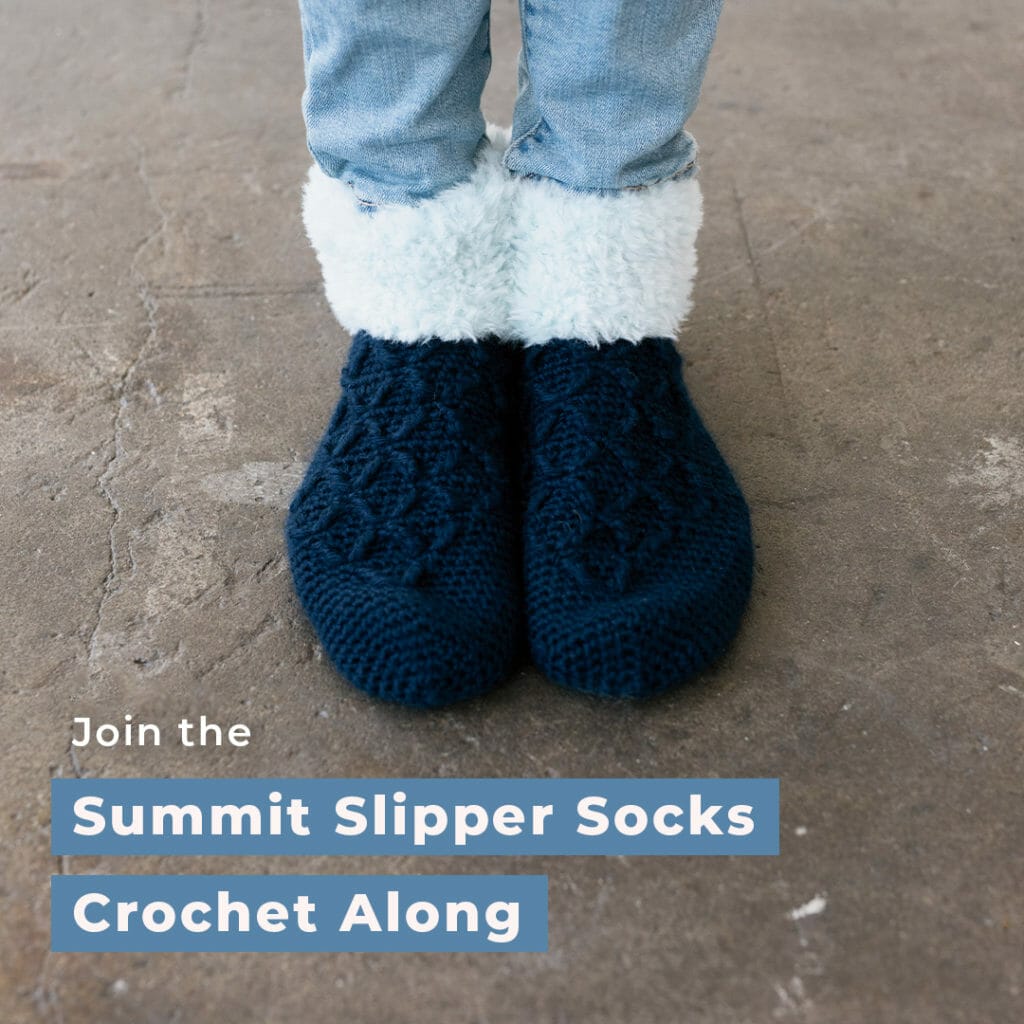
Are you participating in our Summit Slipper Socks Crochet Along? Well we are! We were able to get about 12 team members from WeCrochet and Knit Picks to stitch along with us, so we’re here to show off their handiwork.
First of all, if you haven’t joined but would like to, you can either post in the comments of the CAL Blog Post, or right here in this one! We also talk about it each Wednesday at 9:30am PT/12:30pm ET in our Facebook Live, so join us there if you have questions or want to show off your project.
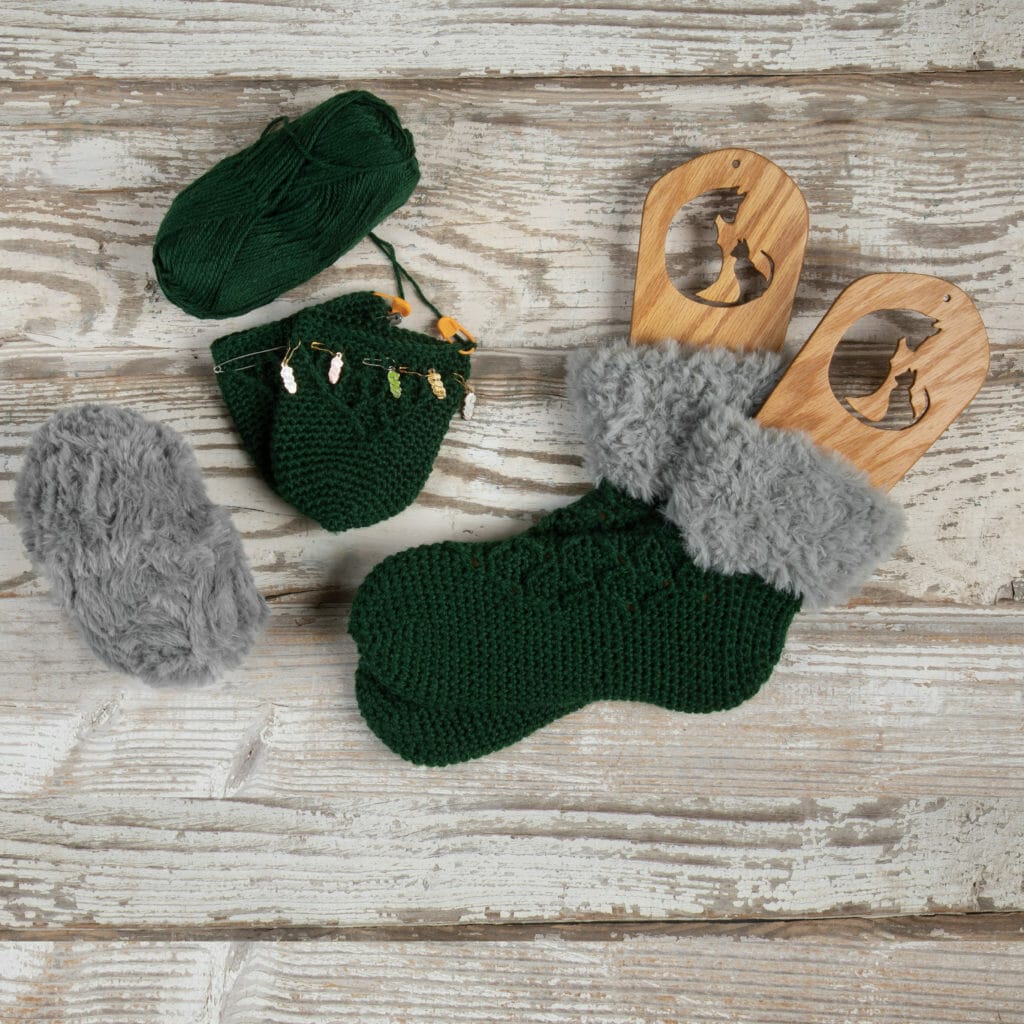
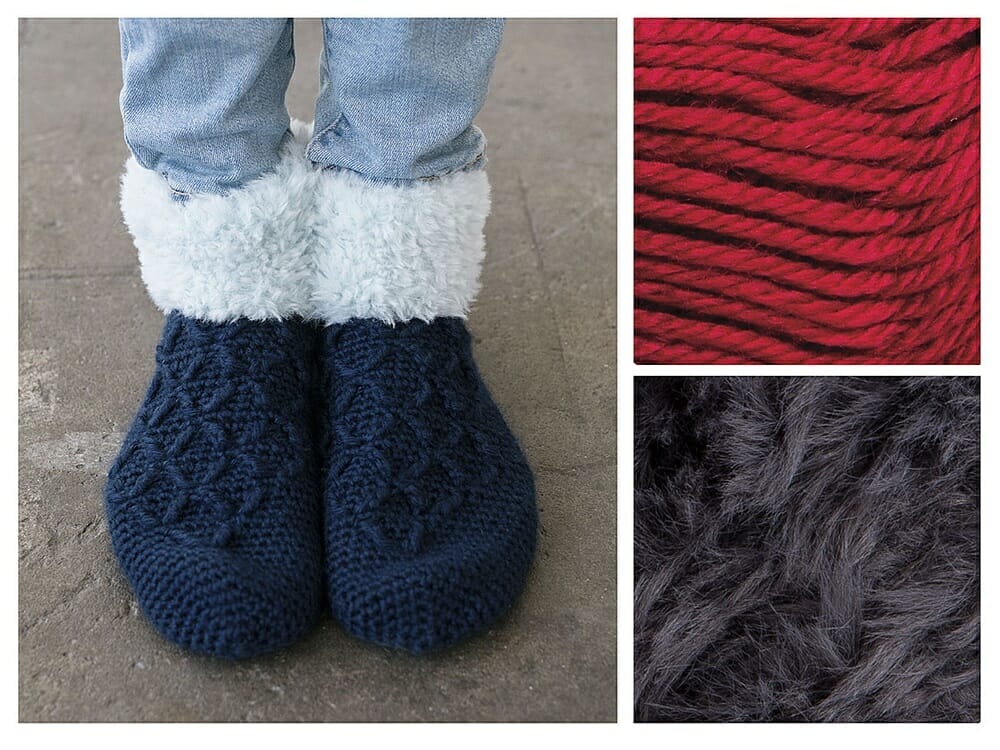
At the top of this post, you’ll see progress from two of our team members who chose the Green & Grey Kit.
The full pair was crocheted by our Outreach Director, Stacey. She claims to have never followed a crochet pattern but we don’t believe her after seeing this! (Also, you can check out some crochet patterns she has written herself!)
The WIP pair is by our new IDP Program Administrator, Alena. We love those little yarn hank stitch markers she’s using!
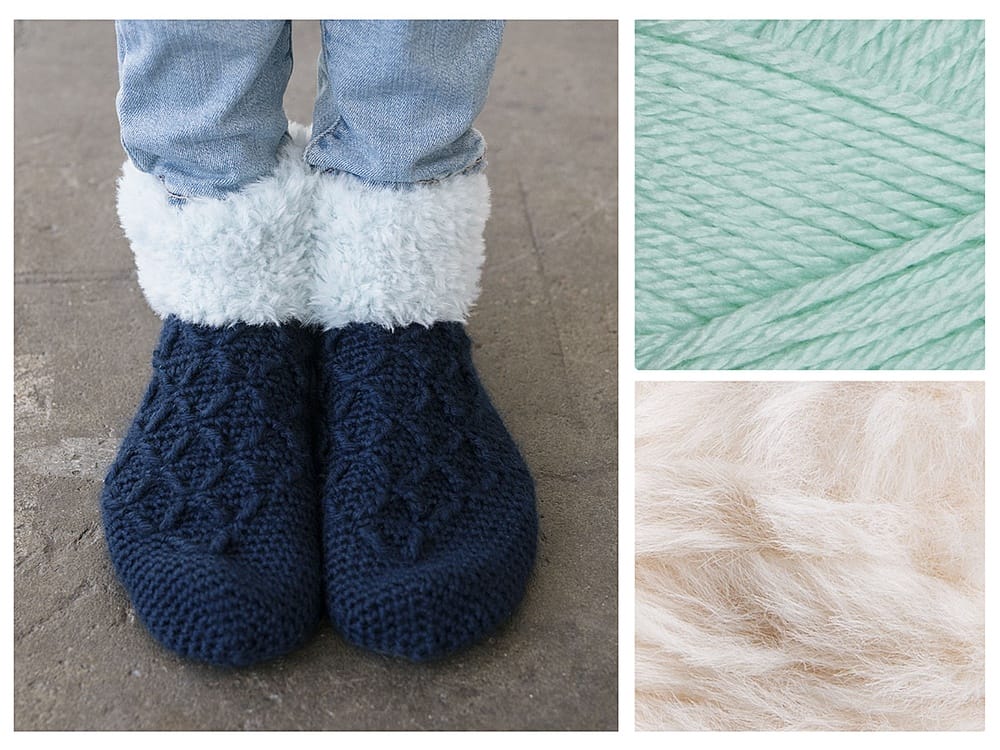
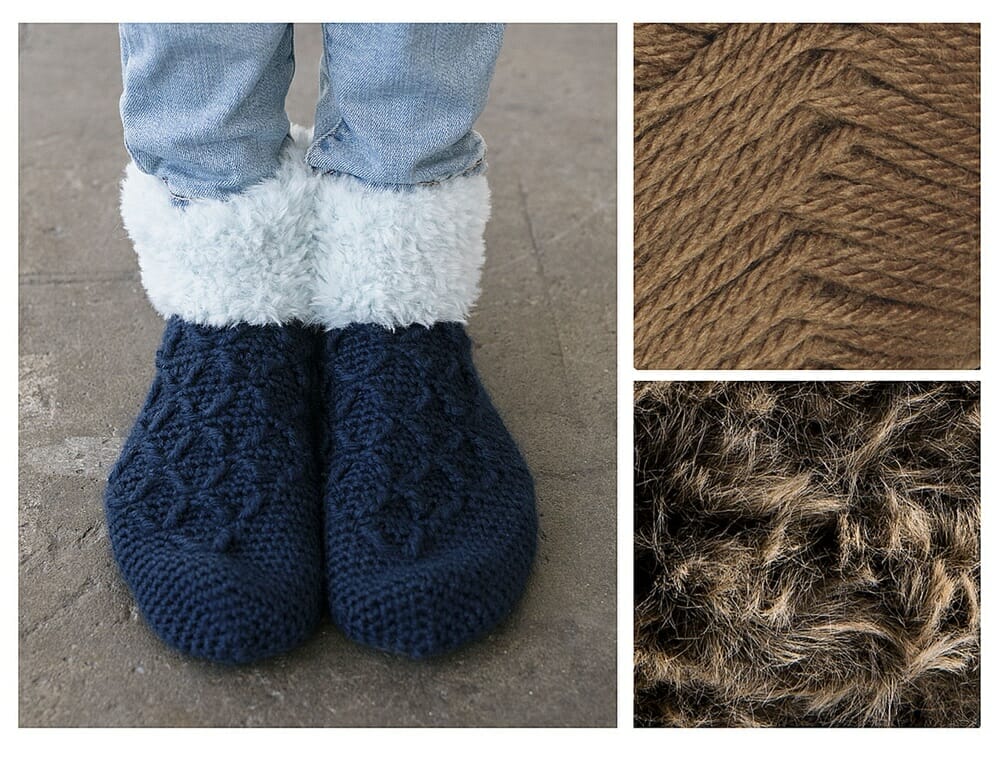
And, we have a couple people who chose the Pink & Pink Slipper Kits. These were made by Liz L., our new photographer (who just started crocheting but she’s taking off like wildfire!), and Hillary, our Creative Director.
Summit Slipper Socks will keep your feet cozy during lazy weekend mornings. A textured lattice detail is crocheted with post stitches at the top of the foot, and a wide faux-fur cuff around the ankle adds a touch of luxury.
Slipper is worked in unjoined rounds from the toe up, then worked in turned rows to form the sides of foot and heel. Heel is sewn together and cuff is added around the ankle opening.
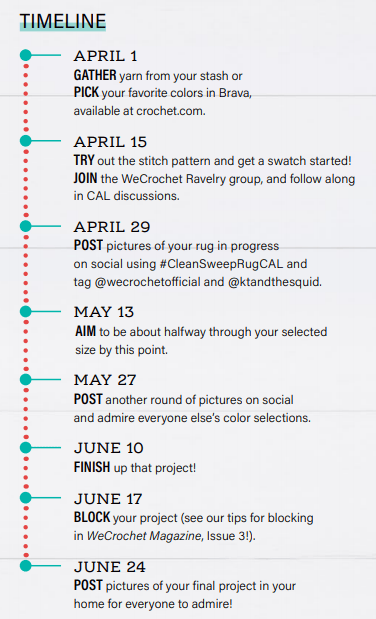
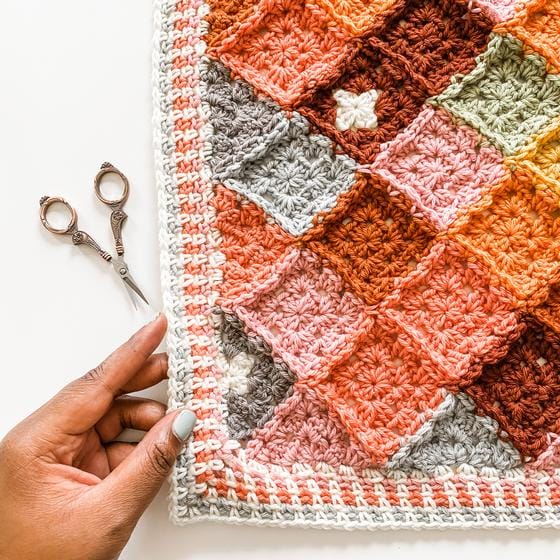
Hi Crochet-Alongers! How are you progressing on your Clean Sweep Rug, our current WeCrochet CAL? If you’d like to join (or just get caught up on all the CAL details), go here to find the Clean Sweep Crochet Along information.
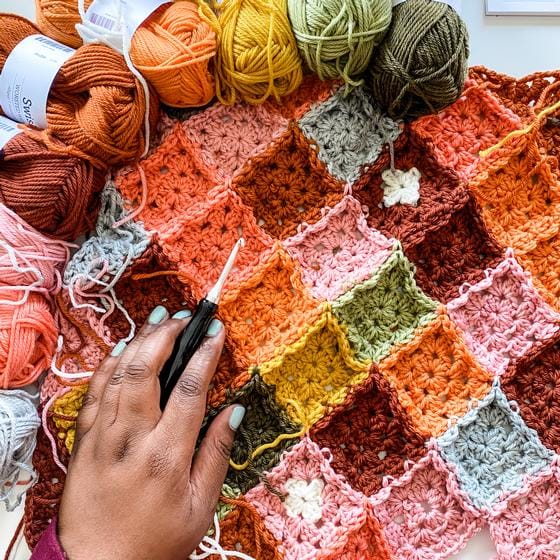
By now, you should have already chosen your yarn, selected a color palette, and gotten started on your rug! Let’s check in on our team to see how they are doing.
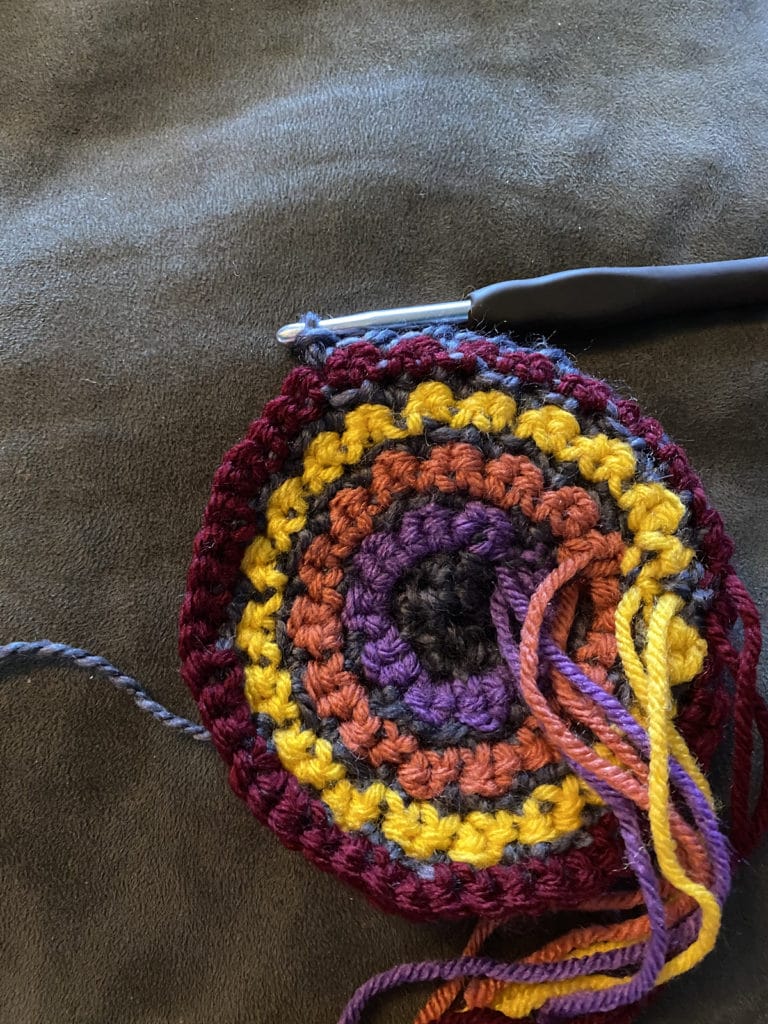
Heather’s Clean Sweep Rug
Heather (that’s me!) is the Marketing person on our team, and responsible for things like working with crochet influencers, posting on social media, and hosting the WeCrochet Podcast! I’m an advanced crocheter who loves to work with lots of colors in every crochet project, so the Clean Sweep Rug is a perfect CAL project for me to have fun mixing and matching colors.
I’ve also been keeping tabs on our community members who are participating in this CAL in its Ravelry thread.
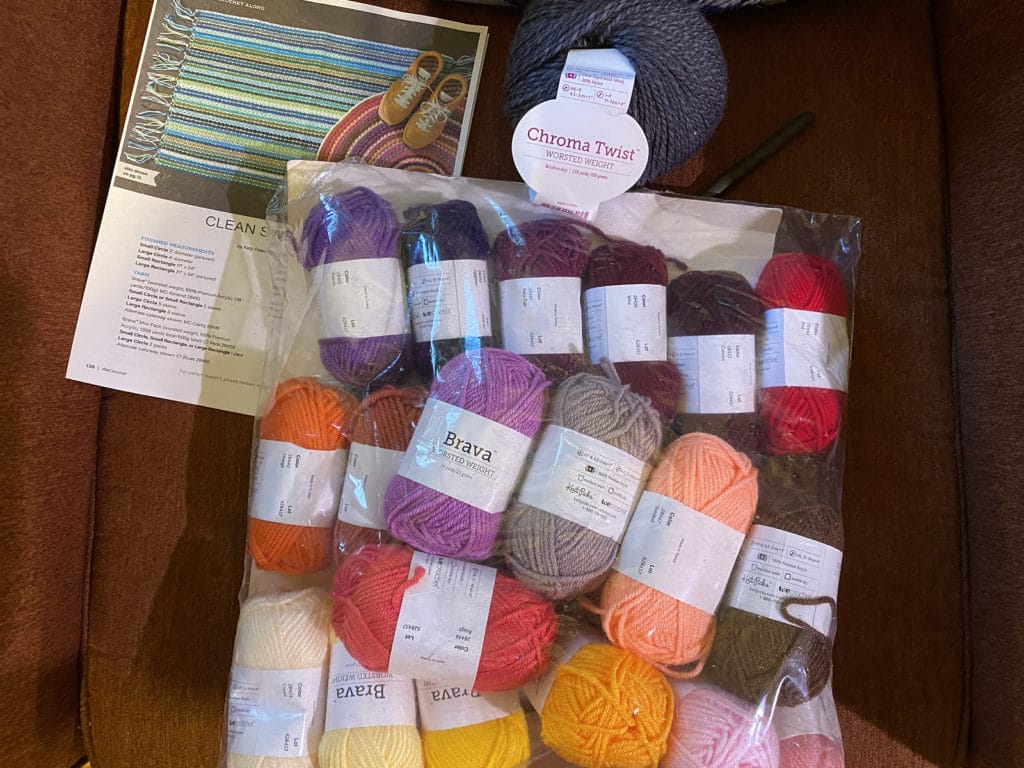
I had a package of Brava Minis in my stash (the Red edition, which is scheduled to be back in stock at crochet.com at the end of May!), and paired it with another worsted weight yarn from my stash: Chroma Twist Worsted in Wednesday (a gray-black).
Follow the pattern as written and ignore the names of the rows bc they’re wrong.
Tips for beginners:
Do the first 3 rows in the MC so you can establish the pattern. It’s pretty fussy if you switch colors during those establishing rows.
Make sure your slip stitches are not too tight or you’ll be annoyed the whole time when trying to get your hook back into the sl st on the next row.
The rectangular version MIGHT be less awkward than the round version but I haven’t tried it.
If you dislike weaving ends, go with the rectangular version because the ends turn into fringe!
After a few rounds you’ll get into a flow.
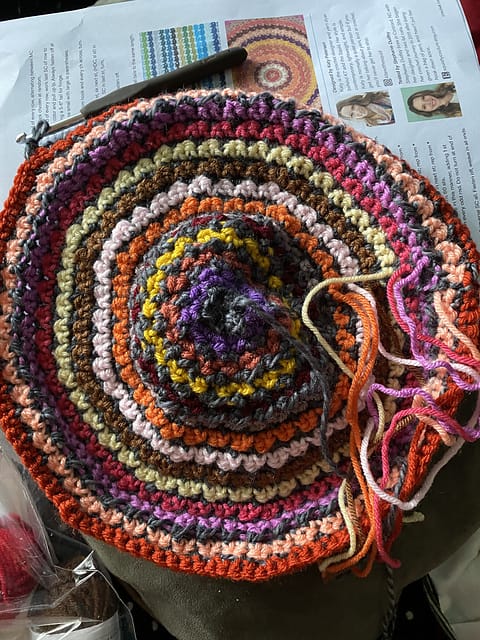
Because this version of the rug is crocheted in the round BUT there’s a turn on every row, I ran into some issues when I noticed I forgot to turn on a round (or two??) so now my wrong side/right side isn’t consistent. I’m not going to frog though!!
I use the first version of a project to work out all the snags, so I keep going instead of ripping out my progress (unless it’s a really devastating mistake). I’ve made lots of mistakes on this, want to hear about them?
As mentioned before, I accidentally forgot to turn the work at least once, so the center of this doesn’t match the outside.
I mixed up the MC with the alt color rows so this is gonna look very different than the original sample.
Because I mixed MC with CCs, I like the wrong side of the colors better, so now the wrong side is the right side (for me).
It’s also bulging out in the middle but curling on the ends. I hope that blocking will fix it, especially because I used a wool for the MC (a fiber which should relax once its blocked).
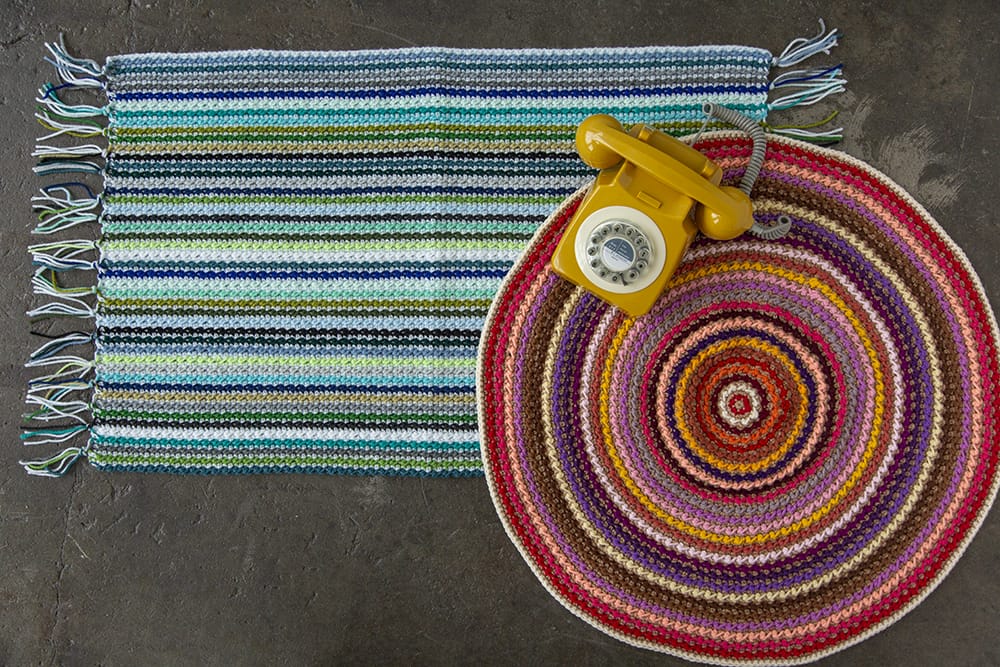
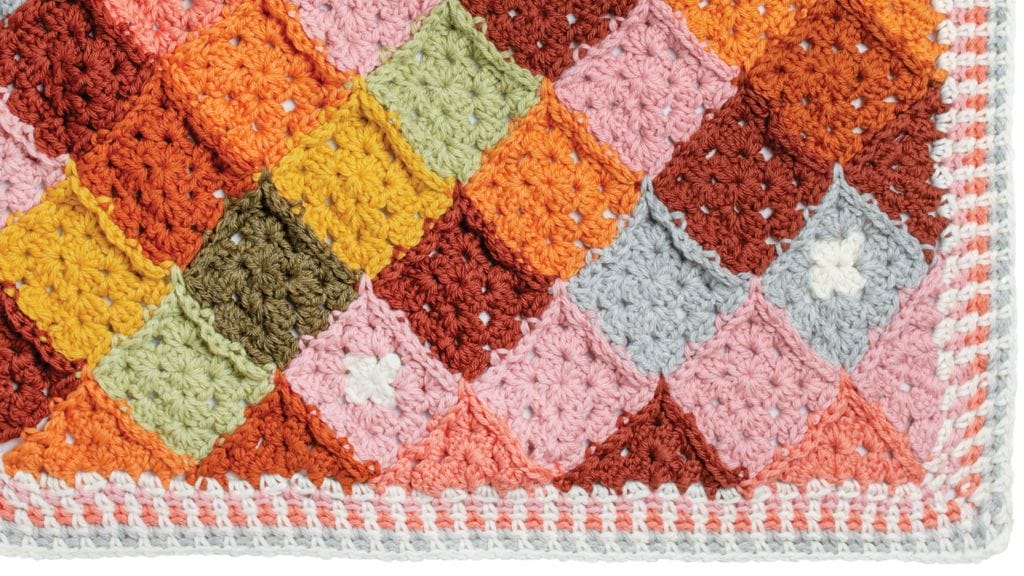
Get ready for some spring cleaning with this stunning rug in many colors designed by Katy Petersen from KT and the Squid (@ktandthesquid)! The Clean Sweep Rug uses worsted yarn and can be made as a rectangle or circle and in multiple sizes.
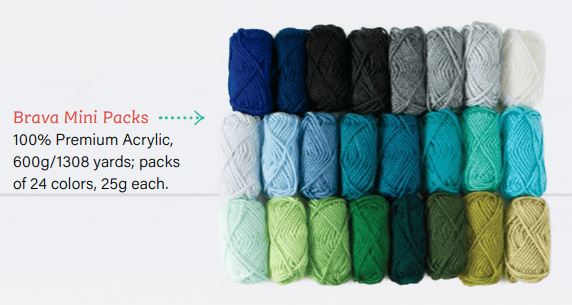
Brava Mini Packs are a great choice for this project because they have so many shades of color-coordinated yarn in a single pack!
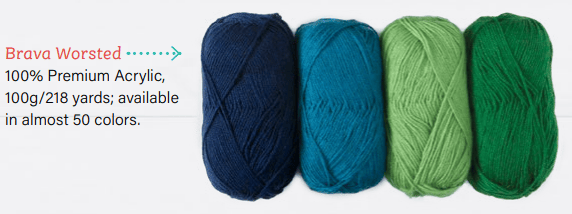
While we recommend Brava Worsted for this project (so many colors, hard-wearing and washable, and you can’t beat the price), this is also a great opportunity to clean out your stash and use colors you have on hand. Pick many colors or stripe just a few; the choice is up to you!
Brava Worsted comes in 100 gram skeins and tons of colors and is a great value.
What color palette do you prefer?
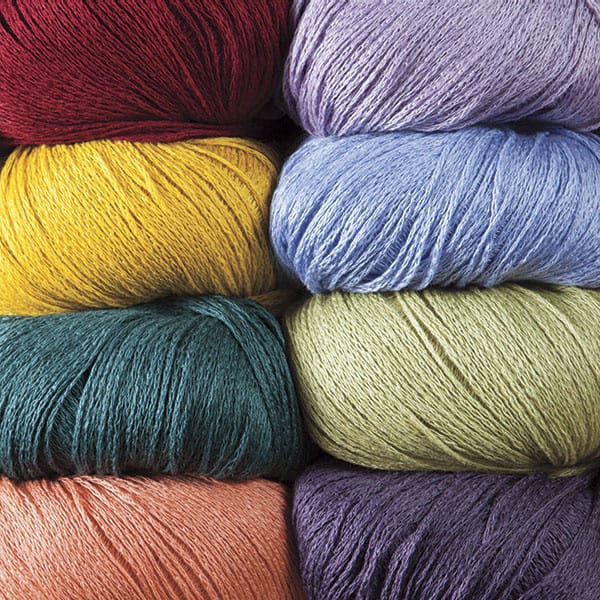
Cool tones (blues and greens, white)
Warm tones (reds, oranges, yellow, purple, cream)
Neutrals (Grays, white and black, or browns, tans and cream)
Retro (brown, orange, yellow, red, purple, with a dash of pink)
Bright (classic rainbow in various shades: Red, Orange, Yellow, Green, Blue, Purple)
Pastels (lighter, softer colors like pink, mint, sky blue, lavender)
Insert your own color palette idea here!
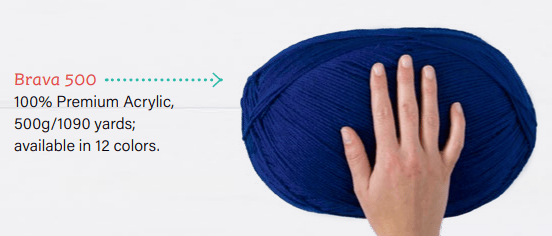
To minimize ends to weave, Brava 500 is our jumbo 500 gram skein of premium acrylic yarn. Coordinates with all the other Brava sizes, and comes in 12 colors. Great choice if you are making a large rug!
How to Join the Crochet Along:
To participate in the Clean Sweep Rug Crochet Along, join and post here:
On today’s episode of the WeCrochet Podcast, we’re talking all about temperature blankets! Whether you’re new to temperature blanket or do them every year, we are celebrating all the variations to this classic project.
First up Sara and Heather chat about the weather and the idea of temperature blankets, which are a snapshot of weather trends in a given location over an entire year.
Then Katelyn gives Sara an overview of the who, what, when, where and why of temperature blankets, with lots of helpful hints about how to organize your temperature blanket yarn, picking a fiber to use, and more. Katelyn loves temperature blankets but she also loves something else. Find out in this episode.
Finally Heather talks to Toni Lipsey, the crochet designer behind TL Yarn Crafts, who designed our Temperature blanket Crochet Along. Toni brought the temperature blanket back into favor with crocheters, and she shares the ways she’s debunked common misconceptions, paving the way for many people to create stylish temperature blankets that they’ll be proud to curl up with at the end of the year. Toni and Heather also come up with the 2020 slogan of the year.
Join the Crochet ALong: Document your year in color when you make the Bias Granny Temperature Blanket using a curated palette in Swish worsted yarn. Each granny square is joined as you go for a comfy, oversized throw blanket. Adjust the colors and temperature gauge to fit your local weather range. By New Year’s Eve, your new favorite blanket will be complete, complete with 365 happy memories.
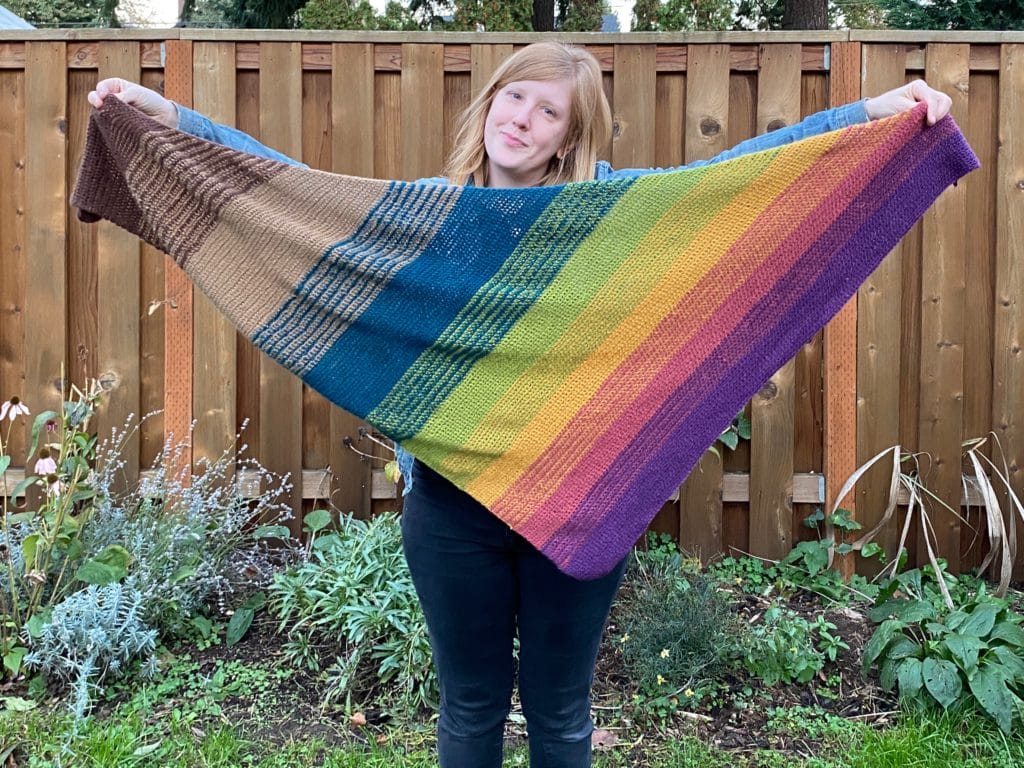
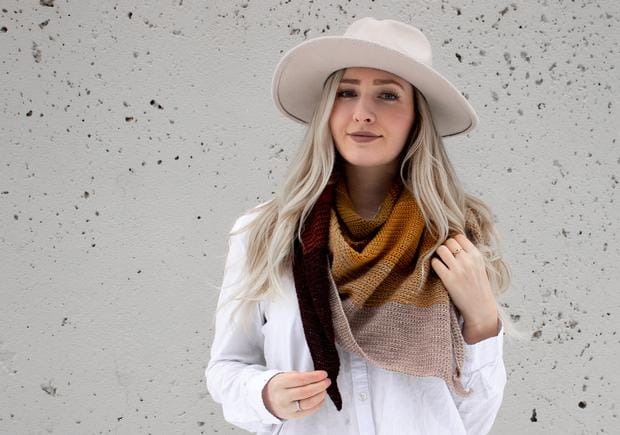
Hi Crochet-Alongers! How are you progressing on your Faux Fade Wrap, our current WeCrochet CAL? If you’d like to join (or just get caught up on all the CAL details), go here to find the Faux Fade Wrap Crochet Along information.
By now, you should have already chosen your fade colors, made a swatch, and have made some progress on your shawl. Let’s check in on a few people to see how they are doing.
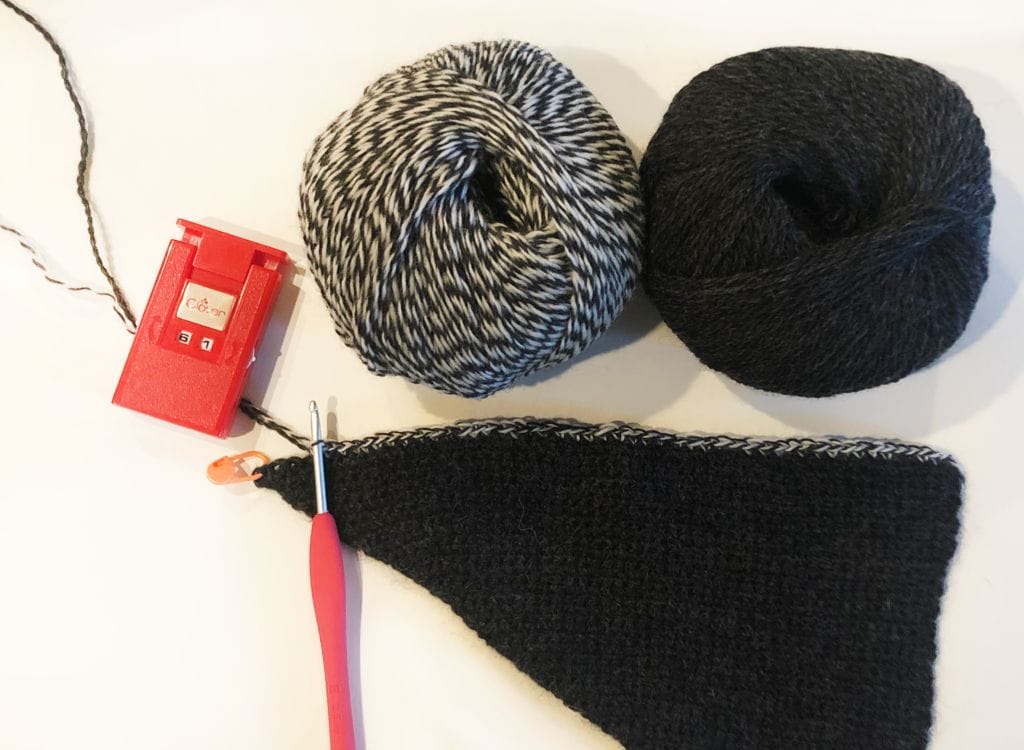
Zoey’s Faux Fade Shawl Progress
Zoey’s color palette is Freddy Kreuger-inspired
If you don’t remember from our last check-in post, Zoey is our digital graphic designer (responsible for all our pretty downloadable calendar wallpapers, WeCrochet emails, and other goodies), and she’s a beginner crocheter who decided to jump in and join the Faux Fade Shawl CAL, with a Freddy Kreuger-inspired yarn color palette.
So how is Zoey doing on her shawl now? She’s making great progress. “I literally never thought I was going to make it past row 1’s turn,” she said. But guess what, she’s made it to her second color already!
Notice that Zoey is using a locking stitch marker to keep track of which side of the shawl needs the increase stitches. She is also counting her rows with a Kacha Kacha Crochet Counter, which helps her keep track without stress.
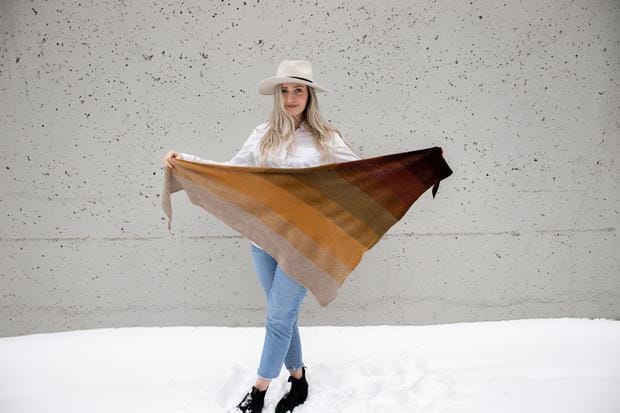
Producer Sarah’s Progress
And BAM! Producer Sarah finished her wrap last weekend, and WOW does it look amazing! All those random single balls of Palette she had really came together to create a beautiful final product. “I’m kinda proud,” she admitted.
Join the Next CAL!
In case you missed it, we have announced our next Crochet Along, and it’s a big one! We’re taking all of 2021 to make a Temperature Blanket. Feel free to join in on the fun.
Now it’s your turn. Share your Crochet Along progress photos on social media and tag us (@wecrochetofficial on Instagram), and use the hashtag #WeCrochetCAL and #FauxFadeCAL.
Join us for the ultimate CAL (crochet along)! We’ll join crochet designer Toni Lipsey through 2021 in making her Bias Granny Temperature Blanket! What is a temperature blanket? It is a way of documenting the temperature throughout a given year.
Document your year in color when you make the Bias Granny Temperature Blanket. This temperature blanket chronicles the temperature for each day of the year using one of three carefully curated palettes in Swish Worsted yarn. Each granny square is joined as you go for a comfy, oversized throw blanket. Adjust the colors and temperature gauge to fit your local weather range. By New Year’s Eve, your new favorite blanket will be complete, complete with 365 happy memories.
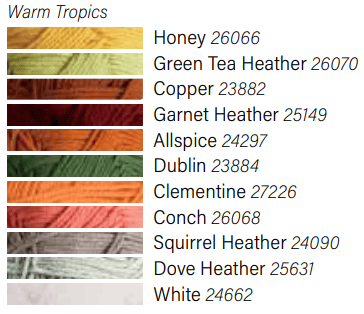
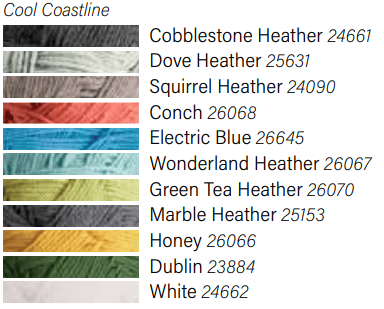
Toni designed this blanket for use with Swish Worsted, and has put together 3 color palettes using that yarn (see below), but you are also free to create your own color palette!
Get the 2021 Temperature Blanket Kits at 20% off!
If you want to create your own color palette, we will provide tips and tricks for that in a future blog post, or check out the WeCrochet Podcast episode 12: Show Your True Colors, in which we talk about how to choose colors for your project, and Toni Lipsey gives tips on how she chooses her wonderful color palettes.
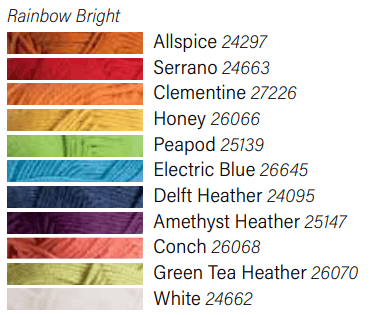
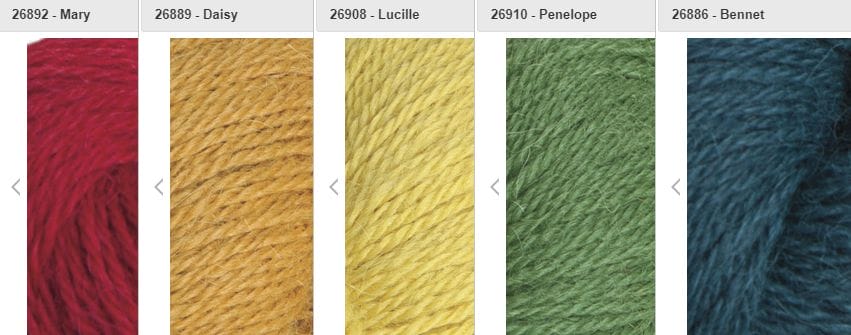
Toni’s Swish Worsted Palettes
If you like, pick one of Toni’s 3 suggested color palettes in Swish Worsted:
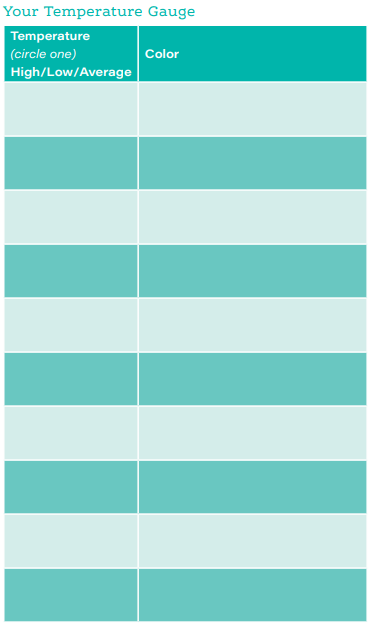
3. Create a Temperature Gauge
Use this temperature gauge to assign a color to a temperature range that works for your location (for example 31-38 degrees is assigned the Dove Heather colorway). Each day throughout the year, you’ll make a small granny square motif in the color to match the high temperature each day. At the end of the year, all the squares will be joined together to create a blanket documenting the year.
Here’s a gauge you can save to fill out:
Toni has made temperature blankets for a few years now, and we can’t wait to join her with this project in 2021! It’s a great reason to find time to crochet every day, and each person’s blanket will be unique to them! Be sure to share your progress with #WeCrochetTempBlanket2021!
How to Join the Crochet Along:
To participate in the 2021 Temperature Blanket Crochet Along, join and post here:
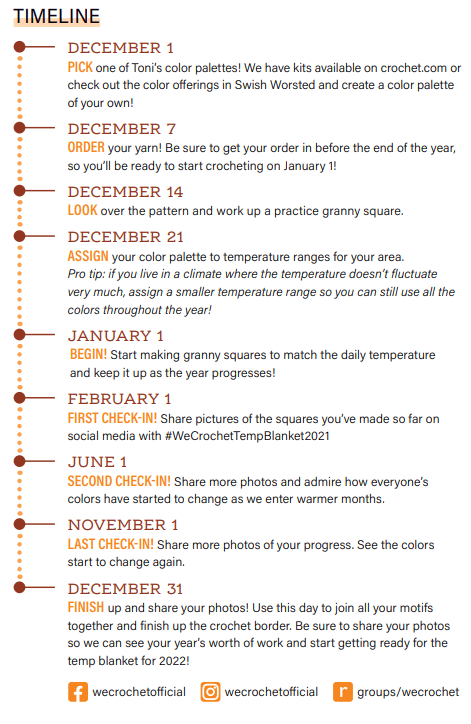
December 1: Pick one of Toni’s color palettes. We have kits available on crochet.com or check out the color offerings in Swish Worsted and create a color palette of your own.
December 7: Order your yarn! Be sure to get your order in before the end of the year, so you’ll be ready to start crocheting on January 1!
December 14: Look over the pattern and work up a practice granny square.
December 21: Assign your color palette to temperature ranges for your area. Pro tip: if you live in a climate where the temperature doesn’t fluctuate very much, assign a smaller temperature range so you can still use all the colors throughout the year!
January 1: Begin! Start making granny squares to match the daily temperature and keep it up as the year progresses!
February 1: First check-in! Share pictures of the squares you’ve made so far on social media with #WeCrochetTempBlanket2021
June 1: Second check-in! Share more photos and admire how everyone’s colors have started as the seasons change.
November 1: Last check-in! Share more photos of your progress. See the colors start to change again.
December 31: Finish up and share your photos! Use this day to join all your motifs together and finish up the crochet border. Be sure to share your photos so we can see your year’s worth of work and start getting ready for the temp blanket of 2022!
Hi Crochet-Alongers! How are you progressing on your Faux Fade Wrap, our current WeCrochet CAL? If you’d like to join (or just get caught up on all the CAL details), go here to find the Faux Fade Wrap Crochet Along information.
By now, you should have already chosen your fade colors and made a swatch, and possibly already started your shawl! Let’s check in on a few people to see how they are doing.
Zoey’s Faux Fade Shawl
Zoey is our digital graphic designer (responsible for all our pretty downloadable calendar wallpapers, WeCrochet emails, and other goodies), and she’s a beginner crocheter who decided to jump in and join the Faux Fade Shawl CAL.
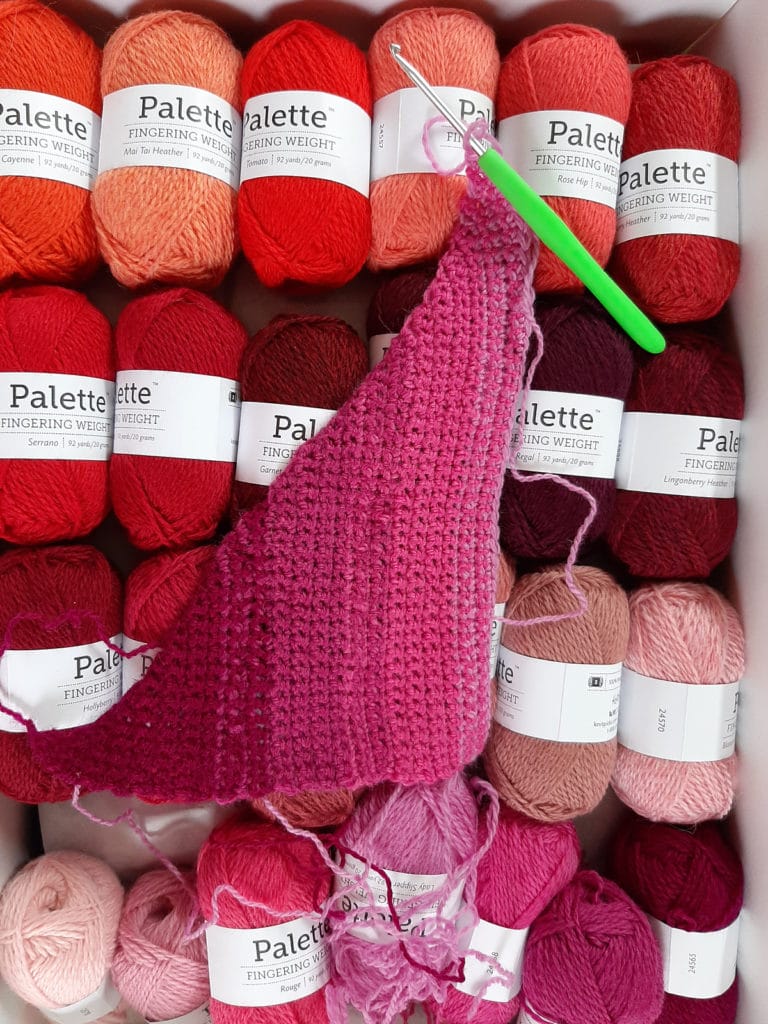
First, she had to choose her color palette! She was thinking a dark red & black palette, (inspired by Freddy Kreuger’s sweater!), so I helped her figure out what colors to use.
She settled on these Palette Fingering yarn colors: Black, Asphalt Heather, Asphalt Twist, Garnet Heather, Tomato, and Larch Heather.
CAL TIP: We also decided that even though this pattern is simple, it is really helpful to have a stitch marker to mark which side you need to do the increases on, since you only increase on one side of the shawl.
That’s all the progress we have to report so far on Zoey’s shawl, but check back in later for more.
Producer Sarah’s Faux Fade Wrap
Producer Sarah is also working on the Faux Fade Wrap. Her project page on Ravelry says: “I don’t have the exact yarns that the pattern calls for so I’m not sure I’ll do the fade effect. I just have single cakes of Palette. Might just do stripes.”
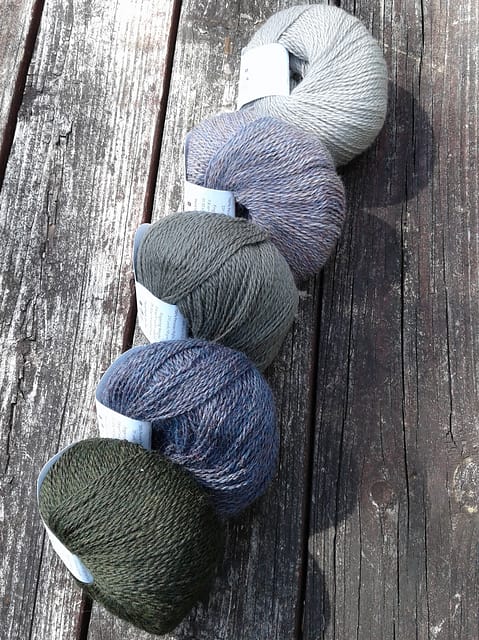
Then SheThatKnits on Ravelry has a really pretty color palette started, in a steely blue-gray array:
Non-Wool Yarn Alternatives?
We got a comment from SusieKrochets, who made a great point — what about those who don’t want to use wool yarn?
“Would be really nice if you could provide at least one wool-free yarn in the kit builder. Some of us are truly allergic, and others are vegan, so having an option would provide more opportunities for people to join the CAL. Also, because I don’t have the pattern or issue 4 of WeCrochet (yet), I can’t look for my own yarn because I don’t know how much to buy.”
I did pass this feedback along to the team, as something for us to think about in future CALs and kits! So what about people who want to use a non-wool yarn for this project?
Because this is made of single crochet stitches, I bet the drape won’t be adversely affected by switching fibers, so you can definitely use a non-wool fingering weight yarn of your choice for this. (Results will vary when you switch up a fiber, but that’s all part of the joy of crochet, dontcha think?). You might want to play around with hook sizes and swatching to make sure the shawl results in a drape that you like.
First though, let’s figure out the yarn QUANTITIES you need for this shawl. The Faux Fade Shawl pattern calls for 1848 total yards of fingering weight yarn
Using Palette, you need: 1 ball lightest color (231 yards) 1 ball light color (231 yards) 2 balls medium color (462 yards) 2 balls darker color (462 yards) 2 ball darkest color (462yards) = 8 balls total
So you can use those numbers to work out what you will need when you substitute yarn for this pattern.
Here are some non-wool yarn ideas for this CAL:
Comfy Fingering
With a large selection of colors, this yarn is a perfect cotton option for the Faux Fade Shawl. The blend of Pima cotton and acrylic fibers in Comfy Fingering make it easy to crochet, and it’s completely washable and easy-care.
Because this yarn comes in at slightly less yardage per ball of Palette (218 versus Palette’s 231 yards), you might want to buy extra balls of yarn, or just throw a single extra in for one of the colors (which should cover the difference, although it might affect where the color fades take place on the shawl.)
Here are a couple Comfy Fingering palettes you could try:
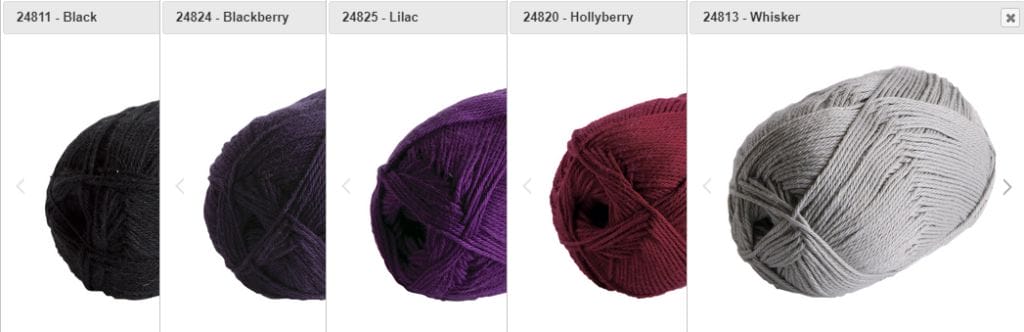
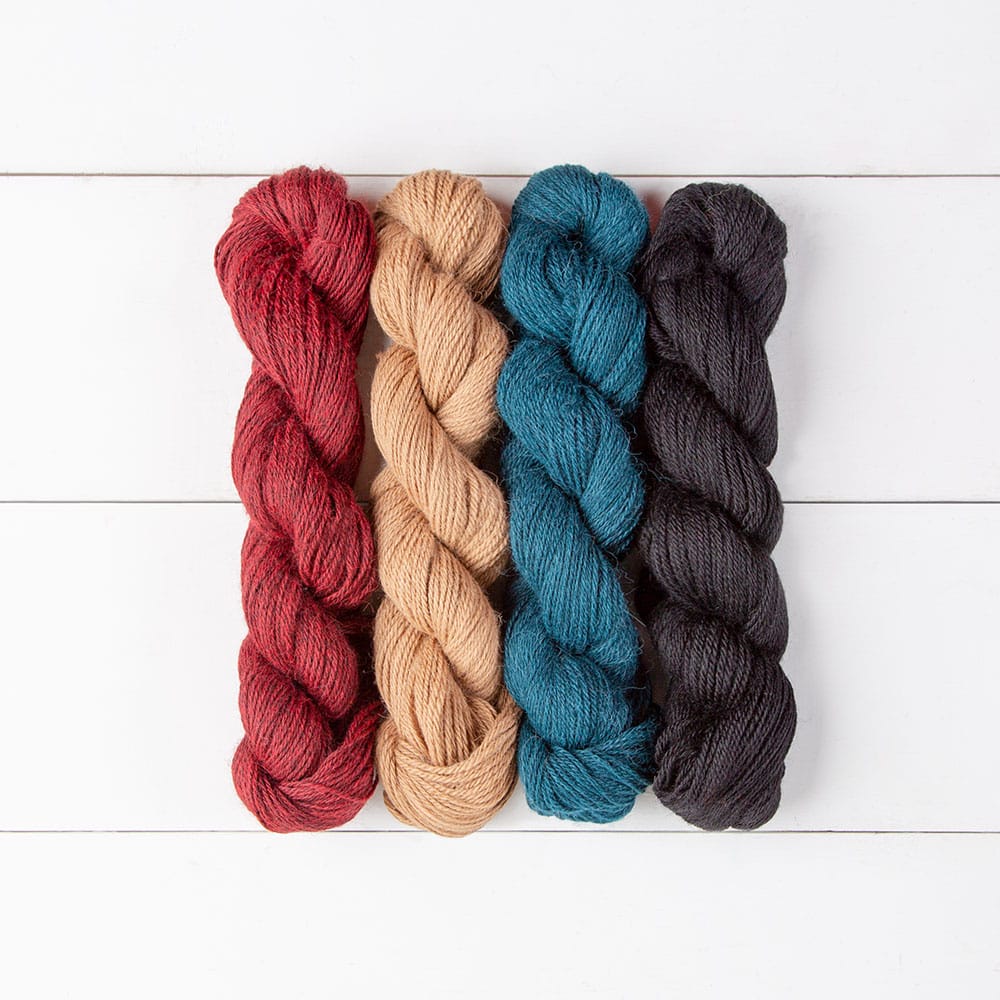
A dark and deep Comfy Fingering palette.
A light and bright Comfy Fingering palette.
Lindy Chain
Superbly lightweight and endlessly versatile, Lindy Chain is a chainette yarn that is just the thing for a warm weather version of the Faux Fade Wrap. It’s a linen-cotton blend. Available in 20 stunning shades that range from rich hues to soft pastels, this is a good plant-based fiber to try for this project.
This yarn has 180 yards per ball so you will definitely need to pick up an extra ball or two to make the full 1848 yards.
Here’s a color palette to try in Lindy Chain:
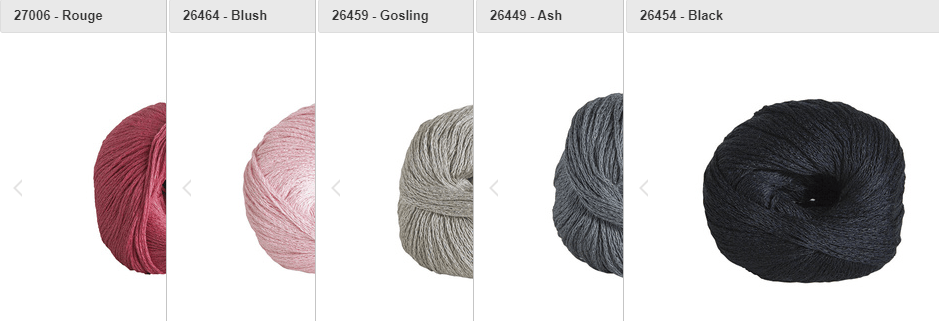
Deep pink fading to gray and then black is a romantic choice for the Faux Fade Wrap.
Alpaca Cloud Fingering
Finally, Alpaca Cloud Fingering IS an animal-based yarn (100% Superfine Alpaca), but it’s non-wool, so if a wool allergy is an issue, this yarn should do the trick. It is super-soft, has a lovely drape, and a nice array of colors to choose from.
Each hank has 200 yards, so pick up an extra hank to make sure you get the full 1848 yards.
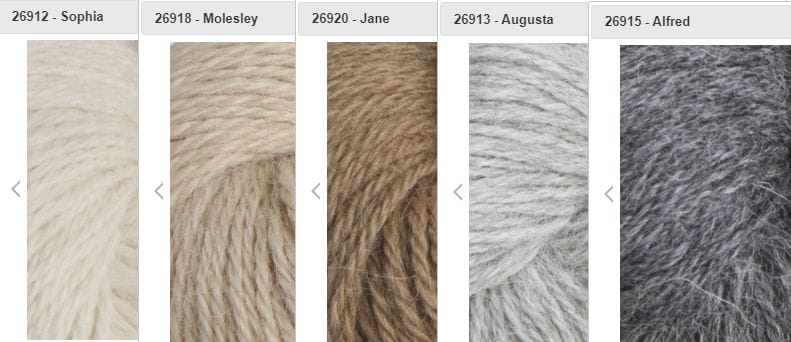
This yarn line has a very lovely array of neutrals, so you can go with an understated neutral color palette:
But this yarn line also has a lot of vibrant colors, so you can create a rainbow fade:
I’m a color geek, so I could sit here all day generating potential color palettes for your Faux Fade Wraps!
Absolutely Nobody: …. Heather: HERE are some PALETTES for your CROCHET PROJECTS!
How is YOUR Faux Fade Wrap project going?
Now it’s your turn! How is your Faux Fade Wrap project going? What colors did you pick for your project? Are you finding the pattern simple, difficult, relaxing, or stressful? Let me know in the comments, or on social media with the hashtag #WeCrochetCAL.
If you haven’t joined yet but you would like to, there’s still time. Find out all the details for the CAL in our Faux Fade Wrap CAL Announcement post.