Once you’ve mastered the crochet basics, it’s time to branch out! Maybe you want to learn some fun new crochet stitches, or perhaps it’s time to learn to crochet cables! In this article, we’ll learn how to crochet cables, and then find some great patterns to start cable crocheting with.

First, let’s just chat about cables. Before I started working for WeCrochet, I didn’t know that crocheting with cables was a thing (I thought cables were only for knitters). Think again! It turns out you CAN crochet cables, and it’s not even that hard once you have some basics down.
So, what are the building blocks of crochet cables? Simple, post stitches are the most basic building block of crochet cables.
First, you need to know how to front post double crochet (FPDC) and back post double crochet (BPDC). If you’re afraid, don’t be! These are highly useful, and not hard at all once you practice them a bit.
How to FPDC and BPDC:
How to work front post double crochet (FPDC): YO, insert hook around post of indicated st from front to back to front, YO, pull through, [YO, pull through 2 lps on hook] twice.
![A hot pink text frame with black text that says: How to work front post double crochet (FPDC): YO, insert hook around post of indicated st from front to back to front, YO, pull through, [YO, pull through 2 lps on hook] twice. Learning FPDC is foundational in order to crochet cables.](https://ejxjjkak52w.exactdn.com/wp-content/uploads/2020/05/fpdc.png?strip=all)
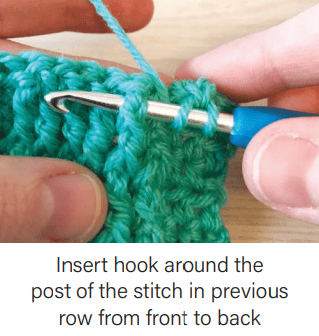
It’s not hard once you understand that you need to put your hook AROUND a stitch (as shown in the photo above). Learning FPDC is essential to learning how to crochet cables.
![A light pink text frame with black text that says: How to work back post double crochet (BPDC): YO, insert hook around post of indicated st from back to front to back, YO, pull through, [YO, pull through 2 lps on hook] twice.
Learning BPDC is foundational in order to crochet cables.](https://ejxjjkak52w.exactdn.com/wp-content/uploads/2020/05/bpdc.png?strip=all)
How to work back post double crochet (BPDC): YO, insert hook around post of indicated st from back to front to back, YO, pull through, [YO, pull through 2 lps on hook] twice.
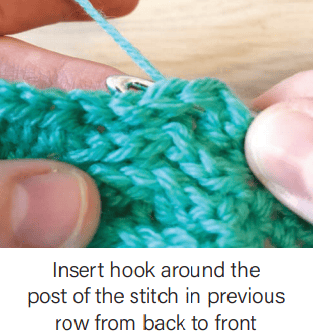
Back post double crochet is basically the same as FPDC, but you stick your hook in from behind the work, around the post, and back out to behind the work.
How to Use Post Stitches to Crochet Cables:
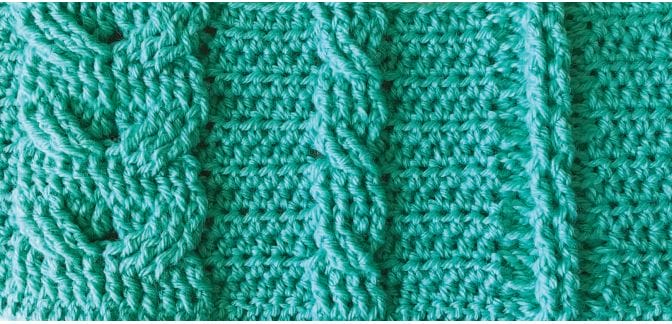
Now that you know the basics for creating post stitches, you can use them to create more intricate stitch patterns, like cables! Cables use crossed front post stitches to create an appearance of twisted fabric.
Crochet patterns will have different cable instructions, depending on the design, and there are many kinds of cables, such as (shown above, left to right) Fishtail cables, 2×2 cables, or even textured stripes using front- and back-post stitches.
But how do you actually make a cable happen?
It’s usually a combination of skipping stitches, doing post stitches, and then coming back to continue crocheting on the skipped stitches, either crocheting in front of the last stitches or behind them, depending on which way you want the cable to appear to twist.
Let’s see a visual demonstration:
How to crochet a left cable
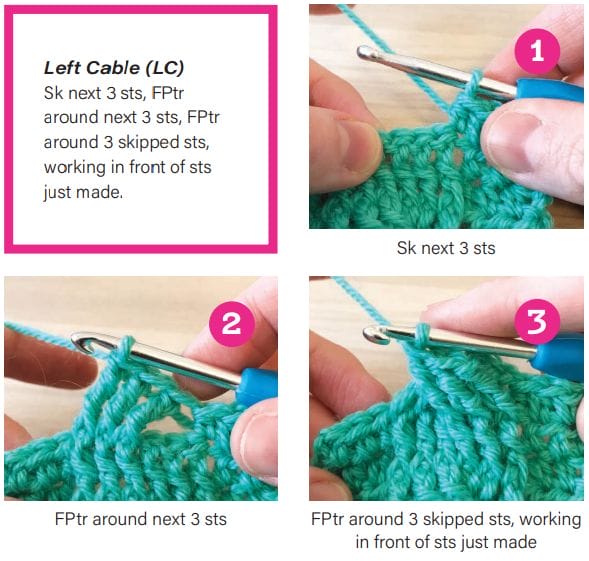
Crocheting a Left Cable (LC): Sk next 3 sts, FPtr around next 3 sts, FPtr around 3 skipped sts, working in front of sts just made.
How to crochet a right cable
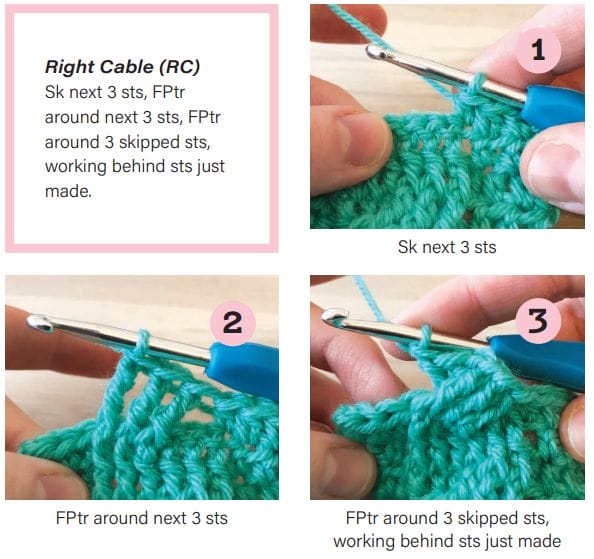
Crocheting a Right Cable (RC): Sk next 3 sts, FPtr around next 3 sts, FPtr around 3 skipped sts, working behind sts just made.
Want to know more about crochet cables?
You’ve just learned the basics of learning to crochet cables. Still want more? Learn more about crocheting cables, including our Pro Tips for crocheting cables in Issue 4 of WeCrochet Magazine.
You’ll also find 13 full crochet cable patterns printed in the magazine, from beginner to intermediate, to more advanced cables. There’s a crochet pattern for everyone in this issue!
Speaking of crochet cable patterns, I promised to point you toward some good crochet cable patterns to start with. Let’s go!
Good Beginner Crochet Cable Patterns:
Here are some great patterns to download for practicing your crochet cables. They’re small, have simpler cables, and will allow you to focus on practicing your technique.
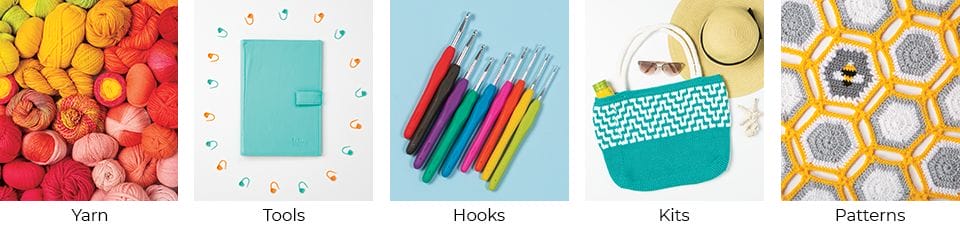
1. Braided Headband

A single braid stands out in the center of this easy-to-wear headband, creating a striking cabled texture that looks intricate without being difficult to make.
The headband is worked in short rows using basic stitches with a 2-row repeat creating the braided cable. The cable uses front and back post treble crochet stitches.
2. Railway Hill Set

This set (hat, mittens, and cowl) is a perfect way for beginners to learn to crochet cables. Build up confidence by only using front post stitches with a background of double crochet and then learn how to do back post stitches while crocheting the ribbing.
3. Funicular Cowl

Interlocking columns of left- and right-twisting cables evoke the structure and movement of a cable-operated mountain railroad, which is where this cowl gets its fun name. The post-stitch cables reach upward from the bottom edge of the cowl, giving it rich allover texture.
This cowl is a tubular design worked in rounds from bottom to top. The cable pattern is created by crossing groups of three Treble Crochet post stitches over one another. Because this pattern is worked in the round, you only crochet cables on the right side (RS).
4. Cascina Cabled Headband

The twisting and braiding of cables in tandem with pops of bobbles conjure a picture of crawling ivy and climbing roses on this contemporary yet classic headband.
The Cascina Cabled Headband is an oval-shaped ear warmer, worked flat from point to point, then seamed together at the end with an elastic hair tie. Unique wedge cable shaping grows from one cable to six at the start and shrinks from six cables down to one at the end.
5. Honeycomb Backpack

Build this practical and beautiful backpack using a textured stitch that looks similar to a honeycomb. The interesting part of this particular stitch is the use of front and back post double crochet stitches to create a pattern that works inside out.
What do you think? Do you feel ready to try crochet cables now? Which project will you make first?