So you want to find out how to build your own crochet pattern kit easily? You can do it in a few simple steps.
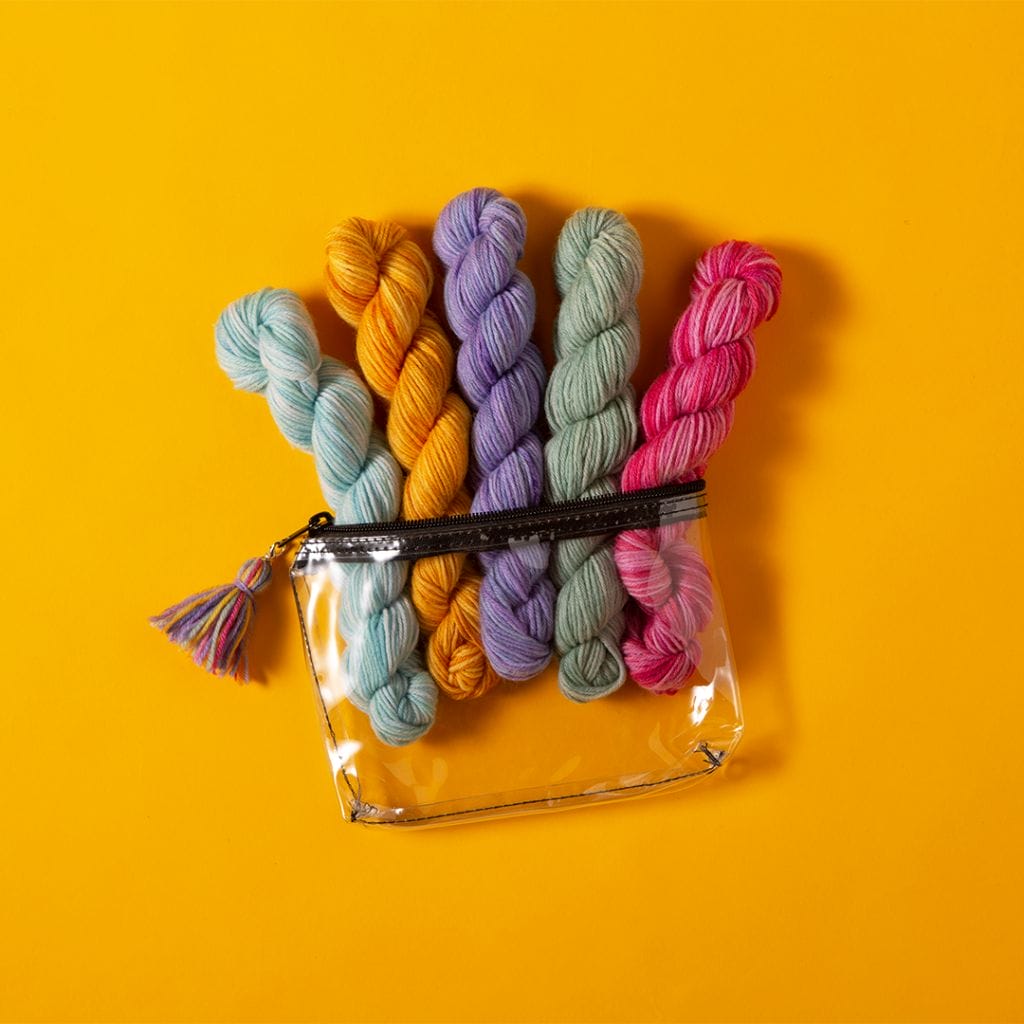
You already know we have a blog, crochet magazine, crochet podcast, and that we sell yarn, hooks, and crochet tools. You know we have lots of great crochet patterns, but did you know WeCrochet also has a simple and convenient way to build kits for your favorite patterns? In this post, I’ll walk you through how to use our Kit Builder to create custom yarn kits for a pattern on crochet.com.
Use Kit Builder on your Desktop, OR use desktop mode on your phone:
The Kit Builder only appears on a desktop browser, so if you try it on your phone, it won’t work unless you switch your browsing mode to the desktop site. How do you do that?
According to How To Geek:
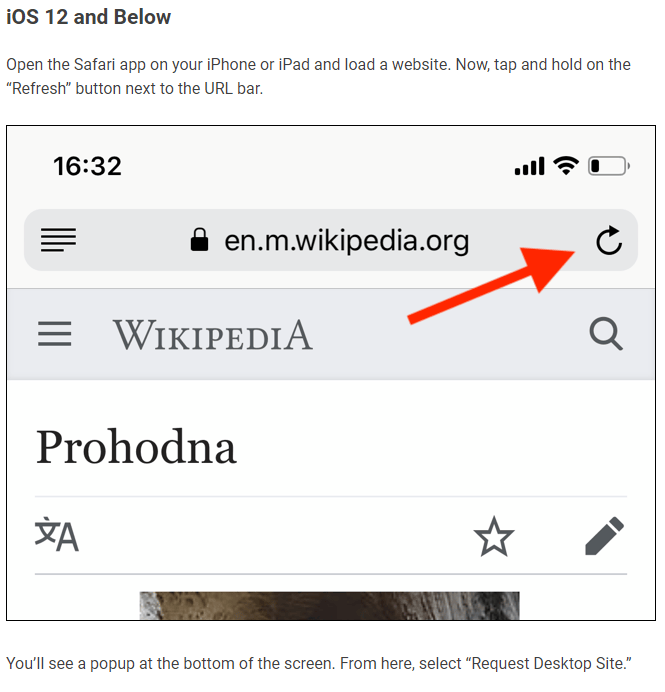
Instructions for switching to desktop site mode are:
iOS 12 and Below
Open the Safari app on your iPhone or iPad and load a website. Now, tap and hold on the “Refresh” button next to the URL bar.
You’ll see a popup at the bottom of the screen. From here, select “Request Desktop Site.”
For more information, please visit the How To Geek article: How to Reach a Desktop Site on Mobile Safari.
For phones other than iPhone, do a quick internet search on how to do this for your phone.
Now, let’s build a kit! Here we go:
1. Find the pattern you like on crochet.com
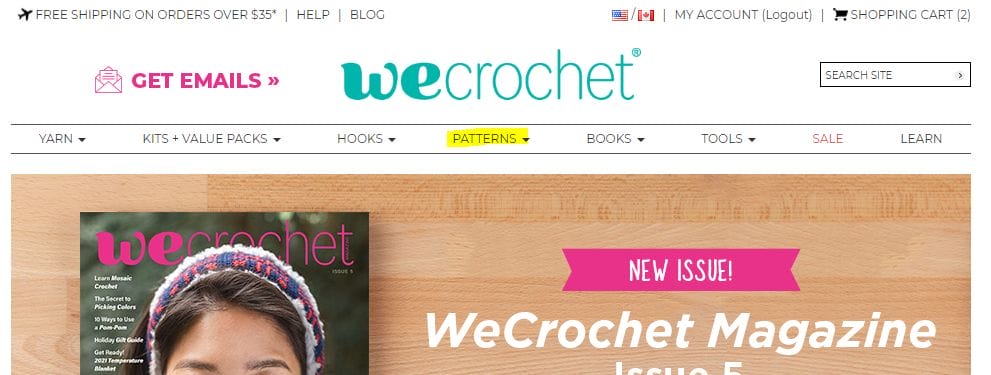
First, go to crochet.com. The landing page will look like this. To browse patterns, click on the “Patterns” tab, highlighted in the photo above.

You can browse the Patterns area to find your next pattern. If you look on the left side of the Patterns page, you can see there are lots of options for how to find a pattern. You can browse by categories including Project Type, Technique, or Designer Showcase, and you can also sort by Free/Paid, Difficulty Level, and much more.
Or, if you know the name of the pattern you want, you can enter it in the search box at the top right side of the site. I entered “Pulmu” in the search box because I want to create a kit for my next Pulmu Pullover.
2. Scroll Down the Pattern Page for Kit Builder
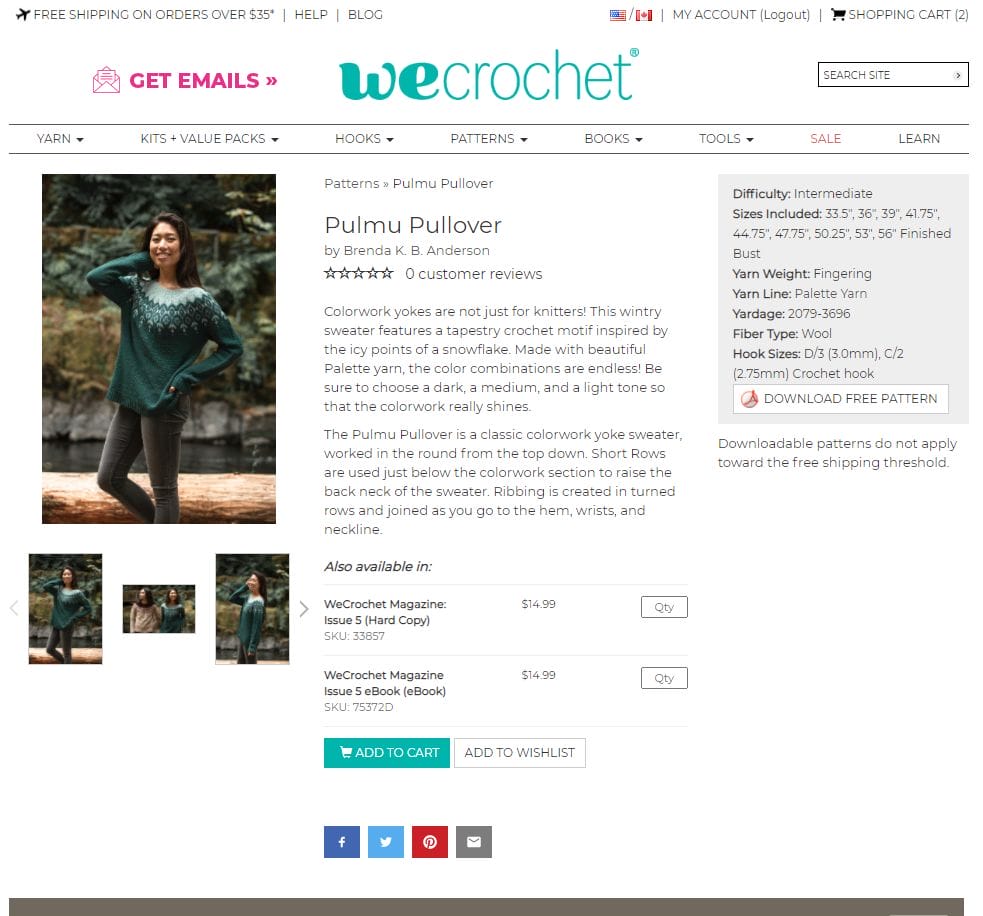
Once you’re on the pattern page, to find the Kit Builder you need to scroll down until you see that taupe brown bar (it’s at the bottom of the photo above).
Sidenote: If you look on the gray box on the right side of this pattern page, you can see that this pattern is available as a free download. You just need to click on the button that says “Download Free Pattern” and you will be prompted to save the pattern PDF.
Okay, now scroll all the way down to the taupe box.
3. Go through Steps 1-4 on Kit Builder to select your yarn
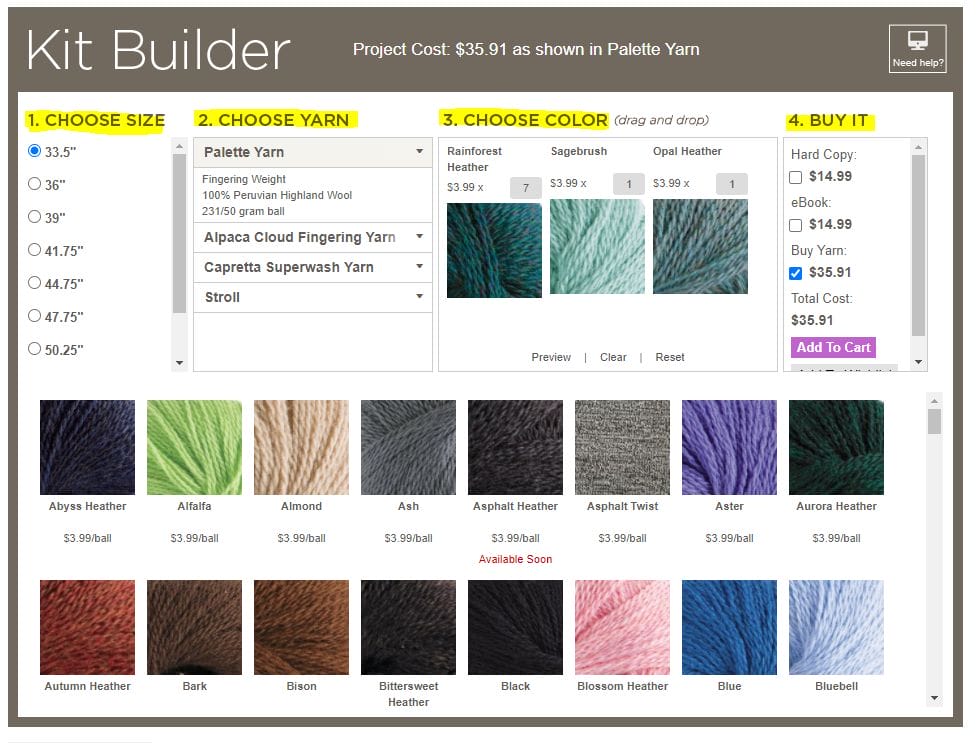
Once you are looking at the Kit Builder box, it’s as simple as following the four steps to choose the yarn you need for your project.
Step 1: Choose Size: Select the size you would like to make. For the Pulmu Pullover, the sizes are labeled by bust measurement.
Step 2: Choose Yarn: The Kit Builder has pre-selected appropriate yarns to work with this pattern. For this pattern, I can choose between Palette Yarn, Alpaca Cloud Fingering Yarn, Capretta Superwash Yarn, or Stroll.
Step 3: Choose Color: This is the fun part!
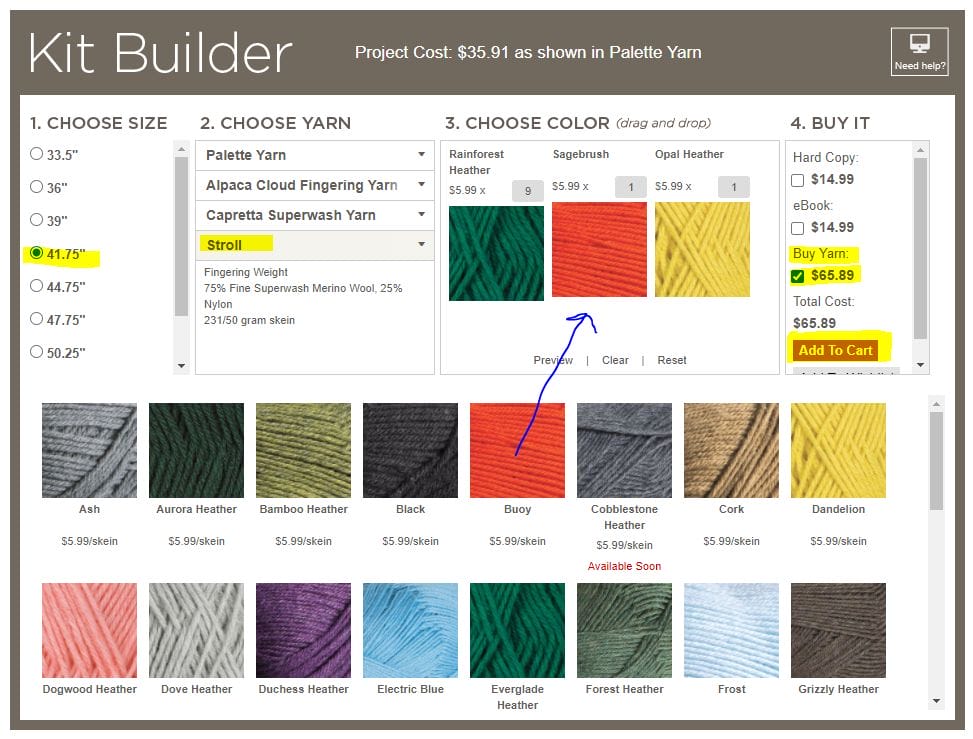
To choose your yarn color, you simply drag the yarn thumbnails from the bottom section up to the top in Section 3.
Notice that if a yarn is out of stock, it says “Available Soon” in red below the thumbnail (such as in the Cobblestone Heather thumbnail in the photo above).
When you drag the yarn colors you want up to the top of the Kit Builder, it automatically chooses the correct number of balls of yarn according to the pattern and the size you picked. For this pattern, notice the first thumbnail in the Choose Color section shows that you’ll need 9 balls of yarn. This is the main color.
Step 4: Buy It: Once you have gone through the first three steps and you’re satisfied with your selections, you can choose to “Add to Cart” via the small button in Step 4: Buy It (on the right inside the Kit Builder).
Notice that this section also gives you the option to buy the magazine this pattern is in, but since the Pulmu Pullover is a free pattern, the box is unchecked by default.
Here’s an example of Kit Builder for a paid pattern:

For paid patterns, the Pattern Download box is checked by default, since you’ll need the pattern in order to make it! If you already own the pattern, it’s as simple as unchecking that box before you click the “Add to Cart” button.
Finally, Add to Cart!
Once you make it all the way through the four steps of the Kit Builder, you can add everything to your cart.

When you click on the cart icon at the top right of any page of Crochet.com, you’ll be able to check out the contents of your cart. You can see here, that I have my Stroll for the Pulmu Pullover in my cart and ready to check out.
And my order qualifies for free shipping!

I’m so close to making this sweater now, and choosing yarn was super easy because I used the Kit Builder feature on Crochet.com.
Now you know how to do it too! So what are you waiting for?


